

Welcome to the ultimate BMW X3 community.
| 04-15-2020, 08:38 AM | #309 |
|
Lieutenant
 
269
Rep 595
Posts
Drives: 2012 F25 (N55), 2014 I01 (REX)
Join Date: Oct 2010
Location: San Diego / Menifee
|
Marty in NY
if you're looking for MORE speed and have a car that takes more passes/wipes than others.... a clay buffer pad may be for you. (I have one, but dindt need to bust it out) https://www.amazon.com/Nanoskin-AS-0...&rps=1&sr=8-48  |
|
Appreciate
0
|
| 04-15-2020, 09:06 AM | #310 | |
|
Brigadier General

2690
Rep 4,310
Posts |
Quote:
What lubricant are you using? I can see your white paint is wet but assumed it was water until I read the blurb and reviews on Amazon. |
|
|
Appreciate
0
|
| 04-15-2020, 03:59 PM | #311 | |
|
Lieutenant
269
Rep 595
Posts
Drives: 2012 F25 (N55), 2014 I01 (REX)
Join Date: Oct 2010
Location: San Diego / Menifee
|
Quote:
ONR - optimum no rinse (imo, a must have for all car owners) hands down, the #1 most useful item in my detail supply cabinet. this little guy can do it all: -when I lived in an apartment, I used it as a "bucketless car wash" or -one can pump 1 oz into my bucket of standard car wash soap, prior to wash. it makes your soap more "slick" -a cost effective quick detailer -using the above ... but totally re purposed ... I mist onto a wet car after wash, to make the surface more "slick" as I dry with waffle weave towel -can be used as clay lube (I use 1 oz per 32 oz spray bottle. if you think about this, my 1 gal jug can create 128 spray bottles of lube. talk about VALUE!) (try to catch it on sale when they do those 25% off promos) https://www.detailedimage.com/Optimu...P444/128oz-S2/ 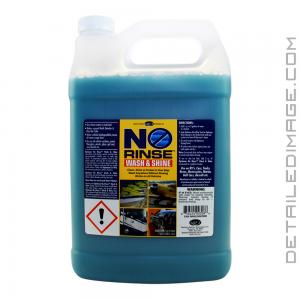 |
|
|
Appreciate
1
Marty in NY2689.50 |
| 04-15-2020, 04:04 PM | #312 |
|
Lieutenant
269
Rep 595
Posts
Drives: 2012 F25 (N55), 2014 I01 (REX)
Join Date: Oct 2010
Location: San Diego / Menifee
|
04/14/20 - Part 3 = The "clay bar" phase... continued.
I spent 30 mins, and did the 4 doors. Also did the A B C D pillars and Rear Quarter Panels.  Bonus: on lunch break, I spent a total of 10 mins doing tire shine:  |
|
Appreciate
0
|
| 04-15-2020, 04:27 PM | #313 |
|
Second Lieutenant
86
Rep 232
Posts |
WOW looks mint
|
|
Appreciate
1
evilchargerfan269.00 |
| 04-15-2020, 04:54 PM | #314 | |
|
Brigadier General
2690
Rep 4,310
Posts |
Quote:
Your car looks like it just came off the factory line!  . |
|
|
Appreciate
0
|
| 04-16-2020, 12:43 PM | #315 |
|
Lieutenant
269
Rep 595
Posts
Drives: 2012 F25 (N55), 2014 I01 (REX)
Join Date: Oct 2010
Location: San Diego / Menifee
|
by the sounds of it, that formula 4 is pretty similar to ONR. I bet it works great when sprayed on a wet car before you dry, and I'm sure it'd even work as a clay lube
reddit users report its good stuff: https://www.reddit.com/r/AutoDetaili...n_secret_told/ thanks for the kind words guys, but up close the car reveals swirls and tons of other defects ... lol. when I get to the phase where I start to buff/polish... I'll do my best to illustrate some flaws |
|
Appreciate
1
the_saintusa3.00 |
| 04-16-2020, 02:28 PM | #316 |
|
Lieutenant
269
Rep 595
Posts
Drives: 2012 F25 (N55), 2014 I01 (REX)
Join Date: Oct 2010
Location: San Diego / Menifee
|
04/15/20 - Part 4 = The "clay bar" phase... wrapped up.
It took 30 mins, to clay the roof, wing, trunk, and rear bumper. The roof was a pleasure, only took 10 mins. Normally would take 2x longer. Yay for having mostly glass up there! I had a "what the heck" kinda moment and clayed the other glass as well, well worth 15 min of effort.    ... next step gets pretty intense, the buffing/polishing phase ... to be continued ... |
|
Appreciate
0
|
| 04-16-2020, 02:39 PM | #317 | |
|
Brigadier General
2690
Rep 4,310
Posts |
Quote:
 Hey, now I know where all the toilet paper went  |
|
|
Appreciate
1
evilchargerfan269.00 |
| 04-17-2020, 02:10 PM | #318 |
|
Lieutenant
269
Rep 595
Posts
Drives: 2012 F25 (N55), 2014 I01 (REX)
Join Date: Oct 2010
Location: San Diego / Menifee
|
It sucks when it gets dirty. On the plus side, its easy to foam car down, and rinse. Then its simply dry and/or add a spray on product to "top off". I only do this massive detail job once per 12-18 months. The rest are basic monthly "quickie" washes.
I cant imagine being in an area with extreme weather ... I'm guessing this is a process thats done 2x a year or more for you guys? Or just accept dirty, and live ... lol In all fairness, that TP was purchased last year for our baby shower. We had a rather grand event with 100+ guests in our home. Our bidet(s) were wildly popular and we went through very little TP that day ... go figure. |
|
Appreciate
0
|
| 04-17-2020, 02:23 PM | #319 |
|
Lieutenant
269
Rep 595
Posts
Drives: 2012 F25 (N55), 2014 I01 (REX)
Join Date: Oct 2010
Location: San Diego / Menifee
|
04/16/20 - Part 5 = The "paint correct / polishing" phase ... The Hood.
This step is one my poor old man back dreads. It is hours upon hours of labor. The 20s version of me, loved doing this kinda stuff. No clue wth I was thinking. 30s me, will only do this once in a blue moon. For those who wonder what products I use: -Machine is a Dewalt Rotary -Polish is D151 - Paint Recondioning Cream (All-In-One) -Pads are MF, I'll start off with the Finishing Disc and see how it goes. Will whip out the Cutting Disc only if I have to For polish I typically use Meguars M105 and then M205, but I'm getting older and lazier so I'm going for 1 step:   Before:  After:  1 hour later, here is the hood from afar:  I'll try to keep the following words as K.I.S.S. as possible: -finishing pad did not cut it -even the cutting pads did not 100% remove all the swirls -I tried 1400, 1600 and 1800 speeds, still not able to achieve a full paint correction -I estimate the job will take 8 hrs for 1 step, 12-14 hrs if 2 step. -I've concluded that if I want this "done right", I will have to do it using a stronger compound (m105) and then a 2nd pass with a polish (m205) -I've decided to "settle" and be happy with it as is ... because I really really dont want to perform a labor intensive 2 step paint correction. I am hopeful for when I am done, I can cover up any remaining swirls / scratches with a super glossy wax to hide the rest of the imperfections |
|
Appreciate
1
Marty in NY2689.50 |
| 04-17-2020, 03:40 PM | #320 | |
|
Brigadier General
2690
Rep 4,310
Posts |
Quote:
Thanks for posting all this, I think it really helps people who want better looking paint but just believe its too difficult or beyond their skill level. You can definitely see the improvement in your before and after pix. Unless you plan on making your car a show piece and never driving it on the street, there is a point of diminishing value to pouring hours and hours into it just to get the very last scratch out there's also a risk in that too. When using a DA polisher and polishing compounds, you can go through the clear coat and eat away at the paint as you're trying to get that last scratch out, so I think you were smart to have stopped where you did, it looks day and night better! I use the same Mequiars microfiber pads as you and the Mequires 105 Ultra-cut and their 205 Ultra finishing polish. With a little time and effort, you can do wonders, like in your pix. |
|
|
Appreciate
1
evilchargerfan269.00 |
| 04-18-2020, 12:08 AM | #321 |
|
Second Lieutenant
60
Rep 256
Posts |
Nice detail work folks!
Today I picked up the X from my favorite bimmer mechanic ever... [shameless plug alert] Dynamic Import Service in Longmont, Colorado... info for anyone in Denver/Metro and the front range, Ty (owner) gives first time customers a free oil change, no gimmick, just to consider his shop. Beyond his BMW expertise, hes just an incredible, honorable individual [end plug] Stage 0 work done: Transmission, Differential, Transfer Case fluids/pans/filters changed, new water pump/thermostat, thrust arm bushings replaced, NGK plugs and new coil packs Stage 2 work done: VRSF FMIC, Charge Pipe, Catted Downpipe installed WOW! Even before the flash tune, the FMIC/Downpipe really wakes her up, noticeable improvement. Im still running stock air intake until aFe gets parts in stock and sent out, but now I can really hear the turbo spool, and its incredible! Very slight sound difference from the catted downpipes, (happy about that as Im not going for LOUD), and no noticeable odor difference at first, but did have a little extra stink after spirited driving on the way home, when I stopped at the mailbox and left her idling. Drove around the block a few times just to feel the difference on stock tune vs stage 2, and then flashed Bootmod3 Stage 2 91 Oct flash (not AGG). Really straight forward flash, no error codes, and took only maybe 3-5 minutes. Had her on the shop charger just to be safe, but really was no need. Noticeable gains, really happy with the overall result! Super torquey from lower speeds to about 50ish? Not as significant gains above 60mph. Ill have to play with it more as opportunities to drive present themselves (some day in the future). But exactly what I was hoping for as a daily driver mostly in town... shes gonna be a riot! Perfect balance of performance, aesthetics, luxury, comfort and utility. I also learned that theres a new part which replaces the original lower cover under the cross beam that supports where the moveable glass meets the fixed panel, and supposedly addresses the rattles that people seem to get in the pano roof. So thats on order and will get it replaced on Tuesday. Although I was so enamored with the turbo whistle and improved exhaust note, it was hard to even notice the roof rattle 
__________________
 2015 650iX GC, S1 BM3, black M-style grille 2015 650iX GC, S1 BM3, black M-style grille2014 F25 xDrive35i MSport, VRSF High-flo catted Downpipe, VRSF FMIC, VRSF Charge pipe, aFe Magnum intake, BM3 Stage 2, xHP Stage 3 |
|
Appreciate
0
|
| 04-18-2020, 05:56 PM | #322 |
|
Enlisted Member

15
Rep 36
Posts |
new X3 diamond carbon fiber grilles / remus
i must say i was prepared to create these as prototypes,
but i think they turned out well enough to be my finals. I was lucky to find this 2015 X3 Msport last year and now i have only 24k miles on it so it feels new in so many ways. back story, this new diamond grille design is becoming more common for the sedans and the aftermarket supports some options for the new G01 X3 etc..... I bought some carbon fiber framed grilles and cut out the factory style dual slat vertical grilles. Then I bought some new BMW X3 G01 chassis diamond style grilles and cut them out and filed and sanded and shaped them down to fit my F25 X3 carbon fiber grill frames......I used a strong adhesive to glue the new cut diamond style grills and now i have acustom set of diamond grilles for this chassis. I love creating new parts where none have existed before. I also added the small horizontal center carbon fiber blades and placed them into my two outside lower grilles. They make a similar product for the X5 but they can cost up to $300 from the EU, but not for my F25 so i cut up some Mercedes carbon fiber parts and created brand new parts. I've added the lower carbon fiber splitter and also some Msport carbon fiber mirror covers. I recently added a Remus dual outlet muffler, a VRSF downpipe / chargepipe / FMIC. I think in one shot you can see the carbon fiber rear hatch spoiler too. |
|
Appreciate
0
|
| 04-20-2020, 08:34 AM | #324 | |||
|
Lieutenant
269
Rep 595
Posts
Drives: 2012 F25 (N55), 2014 I01 (REX)
Join Date: Oct 2010
Location: San Diego / Menifee
|
Quote:
did they replace the pan ... or just the gasket? Quote:
Quote:
the look is def not for everybody. to each their own right? you know what'd be worse? IMO that is. is if EVERYONE looked the same. |
|||
|
Appreciate
0
|
| 04-20-2020, 09:07 AM | #325 |
|
General of the Space Forces
171
Rep 721
Posts |
I just had all the fluids done, my local shop is still open and was able to get me in with a few days notice instead of a few weeks.
Support your local indy shops during this time! What I paid (not including tax): - Transfer case service: $135.79 - Front & Rear diff service: $171.52 - Trans service (oil, pan, filter): $528.19 - Oil change and filter: $123.16
__________________
Current: 2020 X5 x40i M-Sport, Arctic Grey Metallic / Ivory White, Executive Package, Luggage Compartment Package, Integral Active Steering, Tow Package, Parking Assist Package, Driving Assist Package, M-Sport brakes, Tux Mats
|
|
Appreciate
0
|
| 04-20-2020, 10:27 AM | #327 |
|
Enlisted Member
21
Rep 34
Posts |
Programmed the garage door openers. Finally found the "correct" method. First post here. I'll post pics in a separate thread. '14 35i M sport, 29K miles.
|
|
Appreciate
0
|
| 04-20-2020, 12:24 PM | #328 | |
|
Second Lieutenant
60
Rep 256
Posts |
Quote:
Transmission fluid flush with pan/filter assembly: $528 Transfer case fluid flush: $138 Front and rear diffs with new drain plug: $156 I also had the serpentine belt and thrust arm bushings replaced |
|
|
Appreciate
1
evilchargerfan269.00 |
| 04-20-2020, 01:24 PM | #329 |
|
Lieutenant
269
Rep 595
Posts
Drives: 2012 F25 (N55), 2014 I01 (REX)
Join Date: Oct 2010
Location: San Diego / Menifee
|
04/17/20 - Part 6 = The "paint correct / polishing" phase ... drivers side fender. drivers side doors. driver side skirts. and the folding side mirrors.
Pretty straight forward detailing day, had to manually do the mirrors to prevent possible damage from a high powered rotary machine. 45 mins per side. (04/18/20 - part 7 = the same stuff, just on the passenger side)    |
|
Appreciate
0
|
| 04-20-2020, 01:29 PM | #330 | |
|
Brigadier General
2690
Rep 4,310
Posts |
Quote:
So, are you also going to detail the engine bay? |
|
|
Appreciate
0
|
Post Reply |
| Bookmarks |
| Thread Tools | Search this Thread |
|
|


