Not sure if I'll end up writing this well enough for it to be considered a true DIY, but here it goes!
Okay so first of all the patient is a 2012 BMW X3 35i with 80K miles. I have chosen to go with the Shell transfer case fluid, OEM Part # 83222409710.
Link to fluid here ------->
https://www.ecstuning.com/b-shell-pa...222409710~shl/

Before you start this DIY make sure you have a nice fluid transfer pump. The one I used can be viewed here:
https://www.ecstuning.com/b-schwaben.../022253sch01a/
Okay so if my memory serves me correct, here is a parts list of everything you'll need for this DIY:
- 1 quart of transfer case fluid
- fluid transfer pump
- ratchet
- 8mm socket
- 10mm socket
- 13mm socket
- 16mm socket
- 18mm wrench
- flathead screwdriver or a tool to remove plastic push pins
- various extensions
- 14mm hex socket
The two following pictures are the jacking points as described by BMW. The first picture shows the jacking points, and the second picture is the jack pads underneath the vehicle. Use these as a guide to properly raise and support your X3.
NOTE: Be sure to make sure the car is level once it's raised into the air. This will allow for the proper level of fluid to be put back into the vehicle.


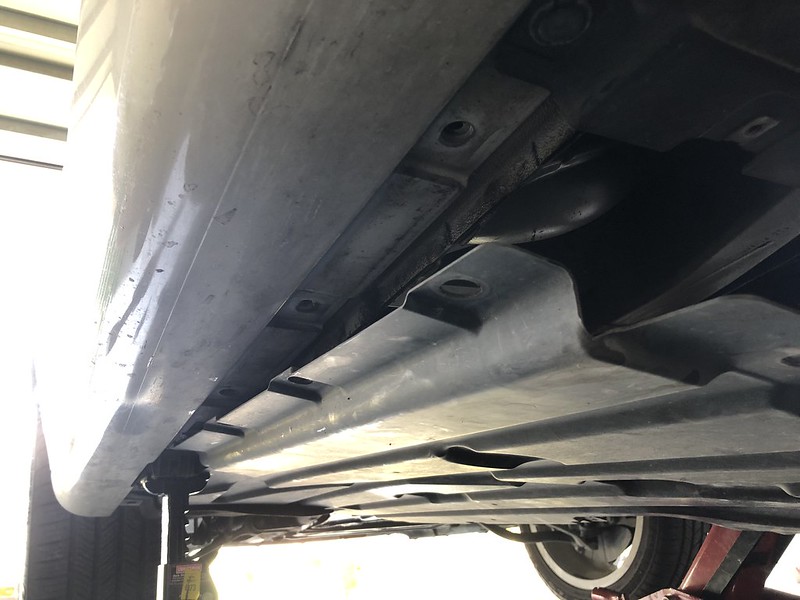
Once the vehicle is up in the air, grab your 8mm and 10mm sockets and go to town on the lower engine cover underneath the vehicle and the cover directly to the rear that covers the transmission.
Once you remove both of those panels, the next thing to do is to remove the underbody panel that's directly under the drivers seat. I partially removed it with it still in place so I could maneuver around it to get to two of the transfer case support bracket bolts. You'll need a flathead screwdriver for the plastic push pins and a 8mm and 10mm socket. I left it hanging like this:
Next thing to do is to support the bottom of the transfer case with a jack before you remove the support bracket. NOTE: use a small piece of wood in between the bottom of the transfer case and the jack.

So now we're going to remove the support bracket. I have seen other people say they didn't remove this, but the amount of room it gives you to work with it removed is SO MUCH EASIER than with it still in place. Don't be lazy. It will literally take you a few minutes to remove it.
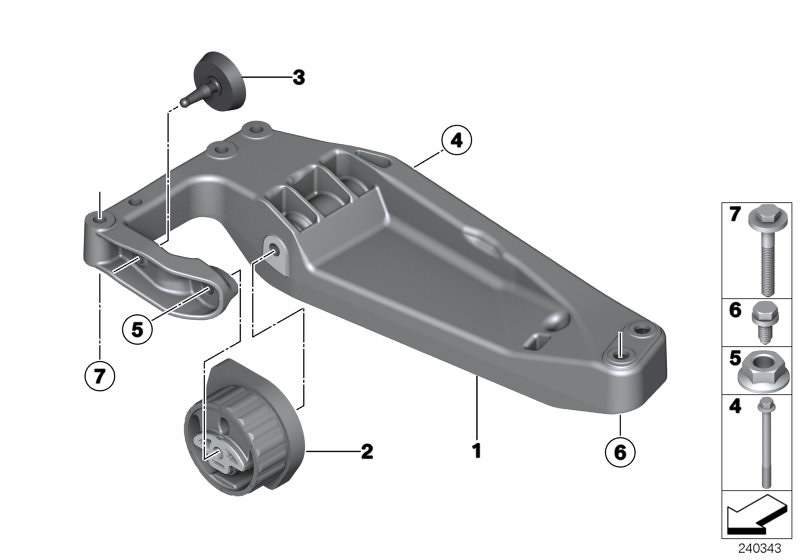
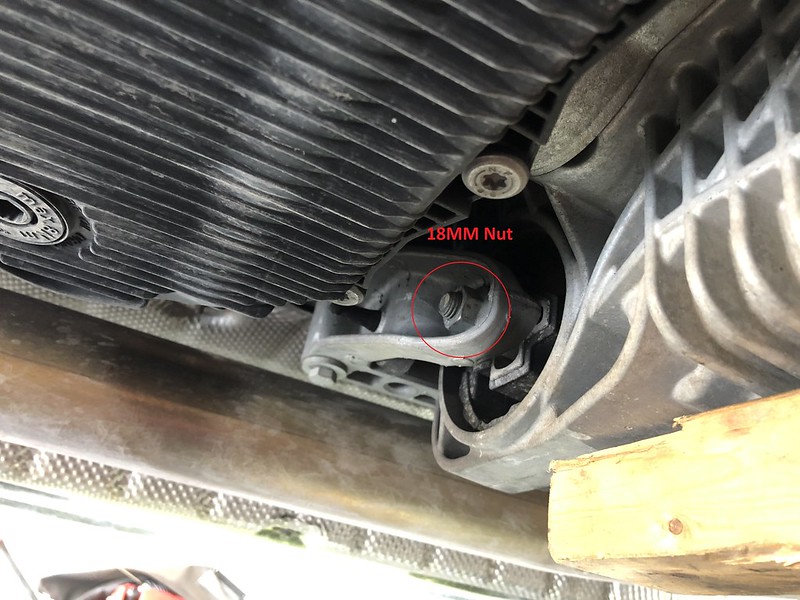
Okay so first, let's start with the long ass bolt that goes through the bracket and bushing on the transfer case. The bolt itself is 16mm, while the nut on the other side is 18mm. Use a ratchet, extension, and socket combo to take the bolt out while using a 18mm close-ended wrench to hold the nut in place. You won't have much room to fit the 18mm wrench in there.

Once the long ass bolt and nut are off, we can remove the (3) 13mm bolts that hold the drivers side of the support bracket in place.

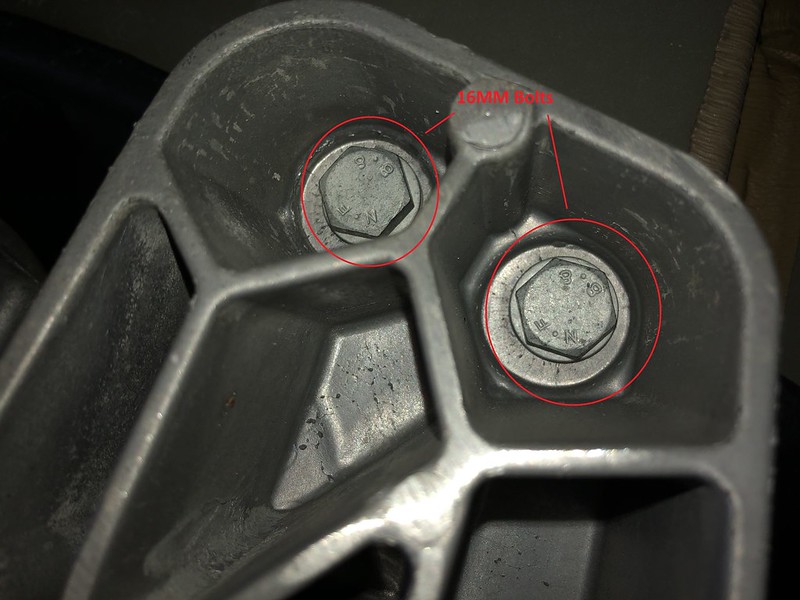
Now we are going to remove the (2) 16mm bolts holding the passengers side of the support bracket in place. These two are hidden by the plastic underbody cover. Pull it down a bit to remove the bolts.
At this point you can maneuver the support bracket out of the way. Set it on the ground and smile at the amount of room you'll have to access the drain/fill bolt.
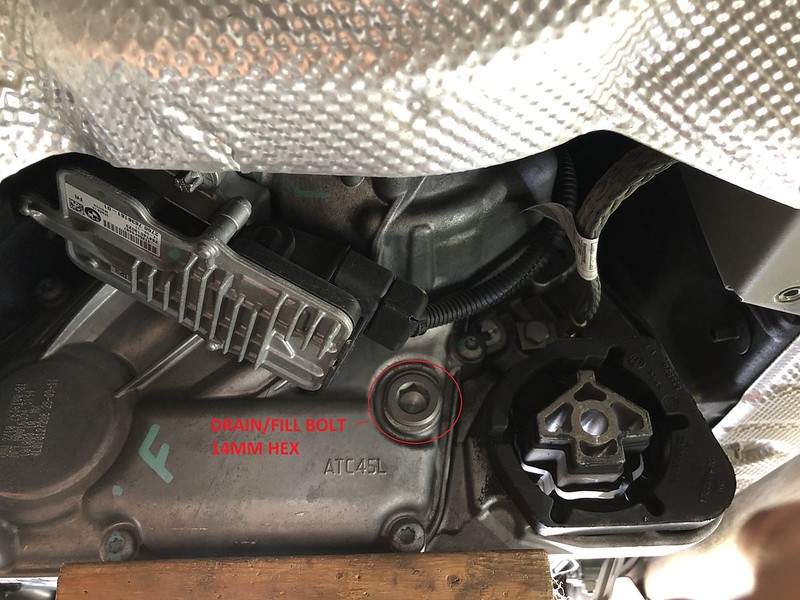
Use a 14mm hex socket to remove the drain/fill bolt on the transfer case.
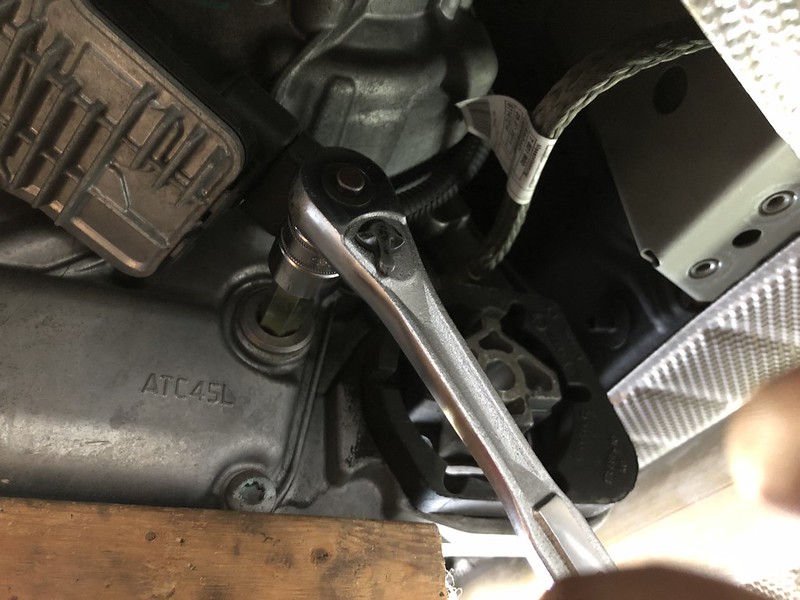
When I removed my drain/fill bolt I had a little bit of fluid come out. Make sure you have something in place to catch any old fluid and also the new fluid once it starts flowing out of the hole!
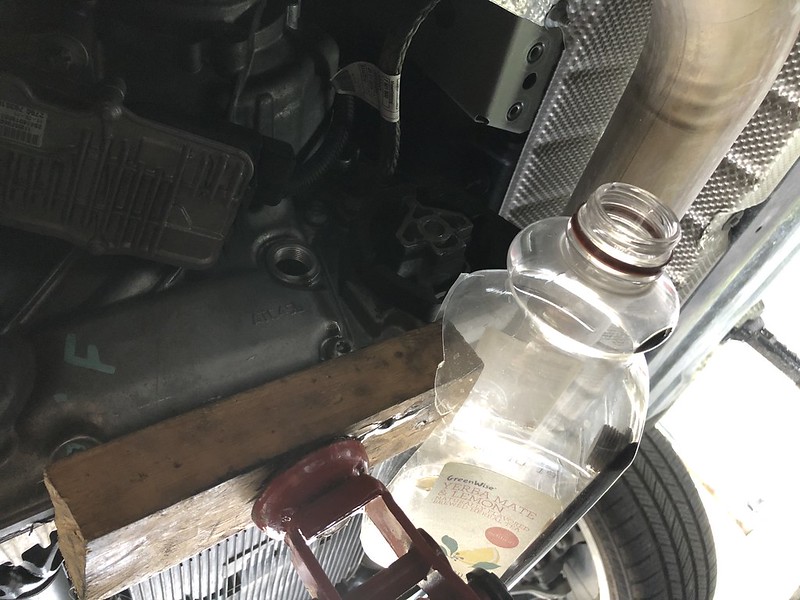
Okay so at this point I am out of pictures but the process is simple. Stick whatever pump you're using into the hole and suck out all of the old fluid. I probably removed roughly 500-600mL of fluid. Pump all the new fluid back in and when the fluid starts pouring out of the hole go ahead and thread the drain/fill bolt back into place and tighten her up to 60Nm. At this point everything is opposite of what you just did so it should be self explanatory. I hope this will help anyone who is attempting this DIY!
