

Welcome to the ultimate BMW X3 community.
| 08-20-2015, 09:13 AM | #1 |
|
There's a storm coming

252
Rep 596
Posts
Drives: BMW Vader
Join Date: May 2008
Location: UK
iTrader: (0)
Garage List 2020 BMW M135i xDrive [0.00]
2019 BMW G05 M Spor ... [0.00] 2018 540i M Sport X ... [0.00] 2018 BMW 540i M Spo ... [0.00] |
Hi Guys wanted to share my experience and create a 'How To Guide' for the removal and update/replacement of the newer style cup holder for the F25.
Now there was some trial and error the main part being there are 2 versions of this holder, one for RHD vehicles (PN 51169301723) and one for LHD (pn 51169301722) yes you guessed it i purchased the LHD version first, never noticed this, stripped down the centre console and then realised. so make sure you order the right one, by the way if anybody needs the LHD version drop me a PM, more than happy to do a deal on this  Difficulty - Easy - just take your time Time - 30-45 mins Parts Cup holder 51169301723 (RHD) (trade price ã51.60) Cup holder 51169301722 (LHD - i have one spare) Rubber insert, cup holder 5116930904 fits both LHD/RHD (trade price ã5.45) Total under ã60! Tools - Torx T20 Flat Trim tool Insulation tape Small flat head screw driver Also needed - Patience and marginal force Original 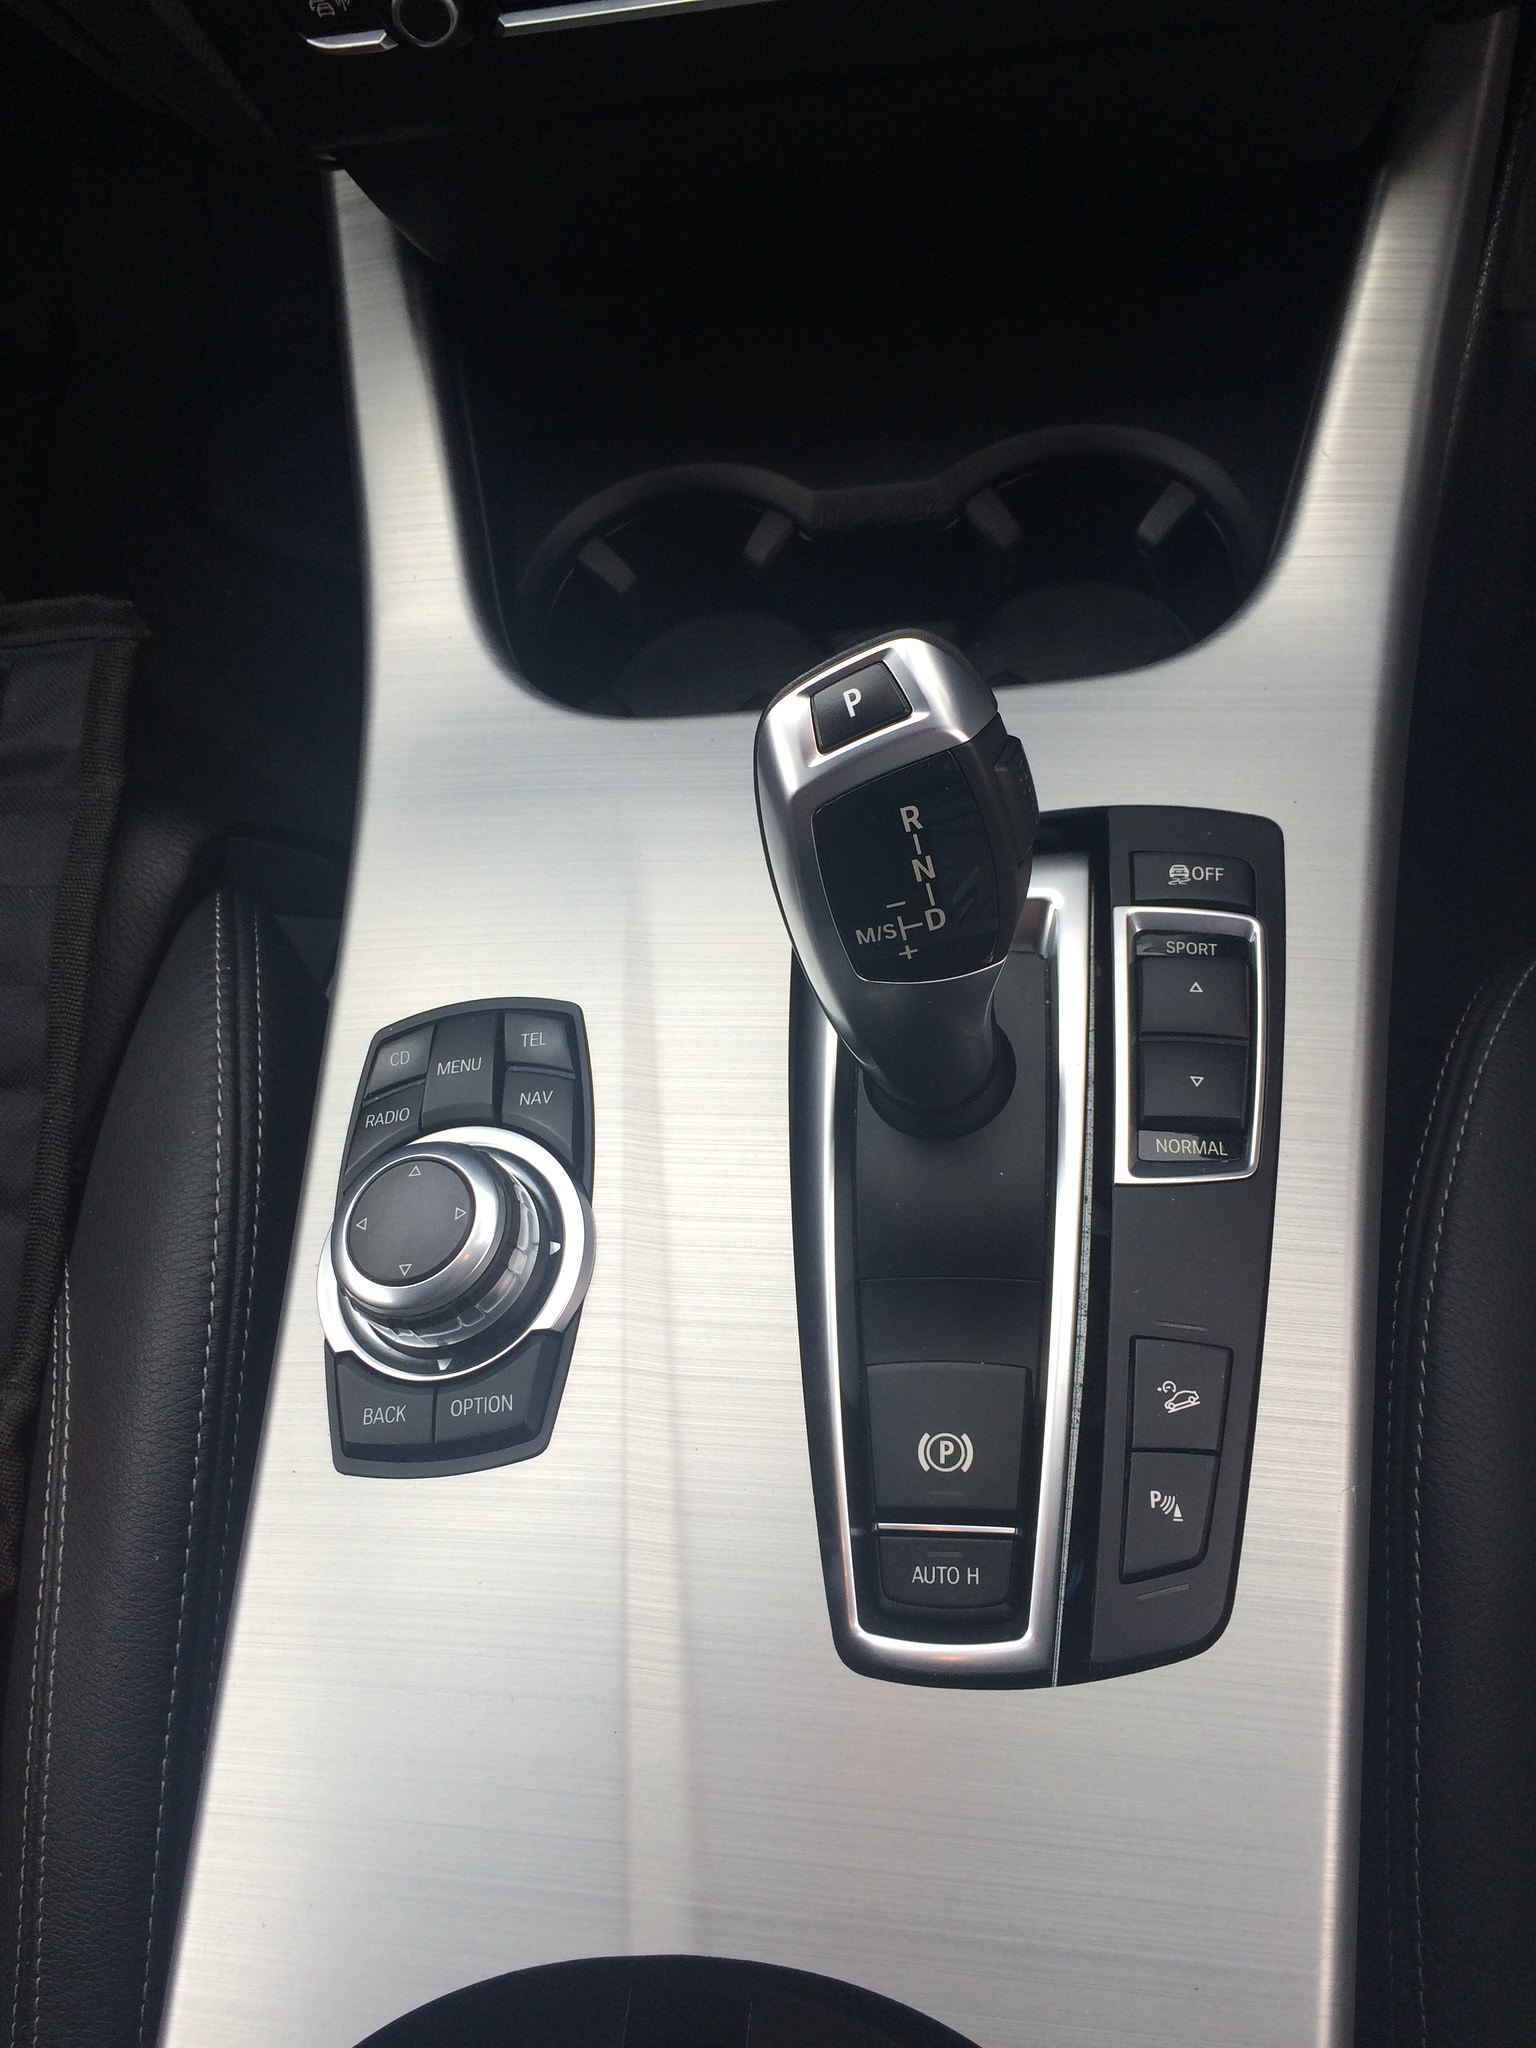 Ok so first step Open up the arm rest and proceed to remove the trim around the gear shifter by popping the clips on each side. i used a flat wide trim tool so as not to mark the softer trim underneath. Moderate force got this to move with no trouble. 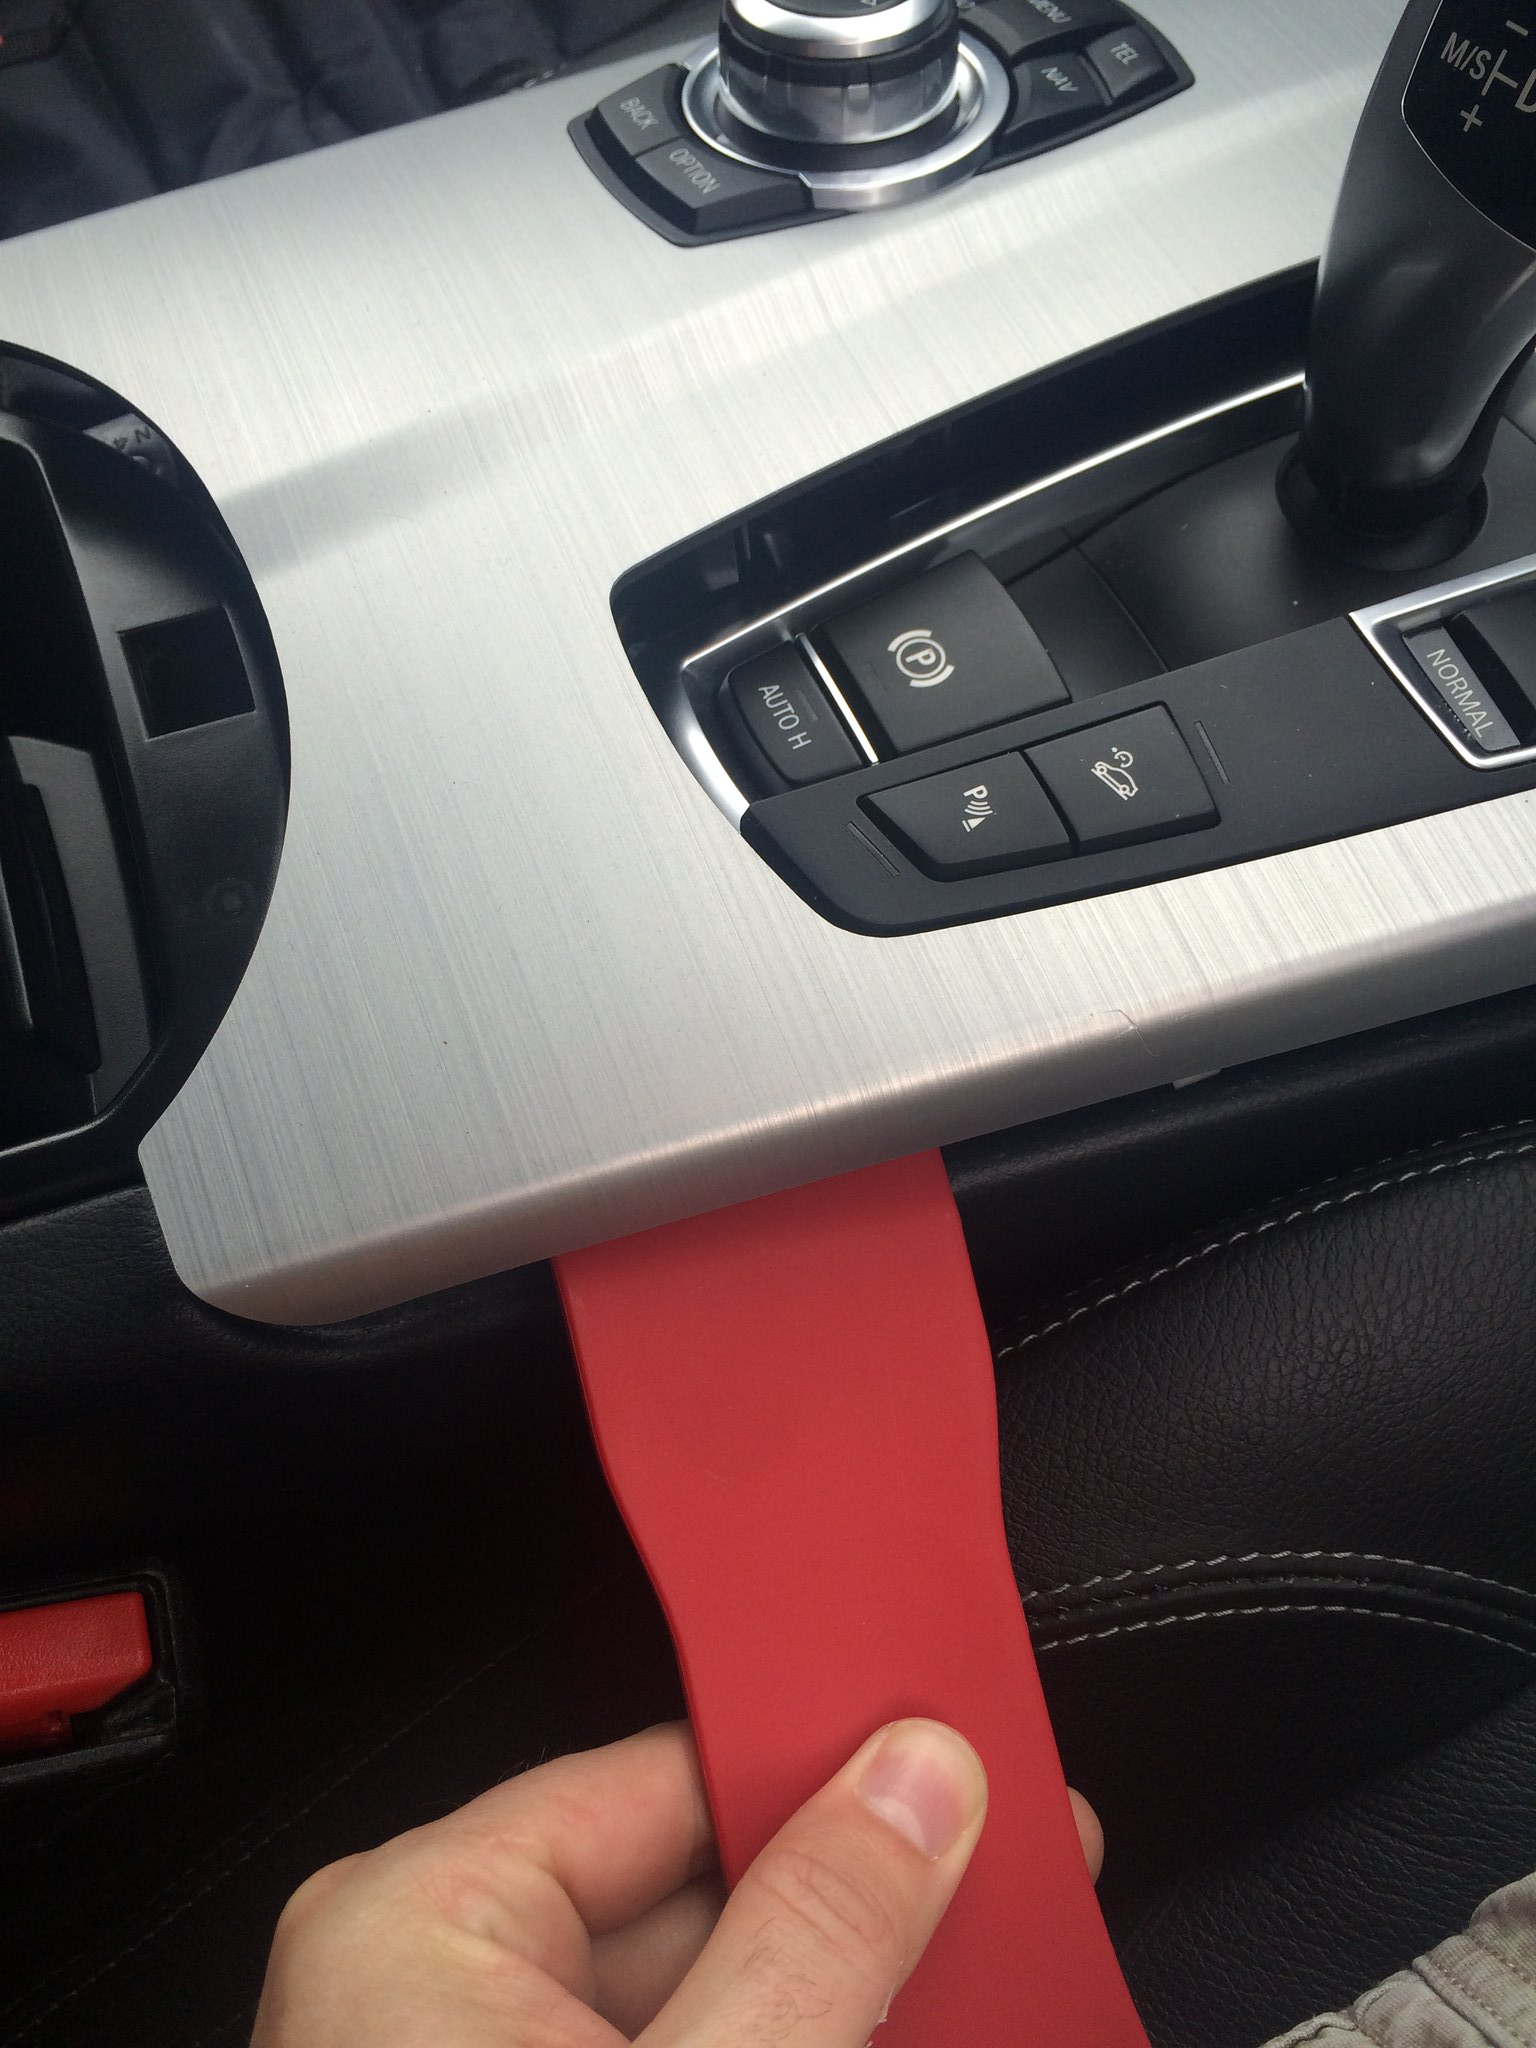 and here 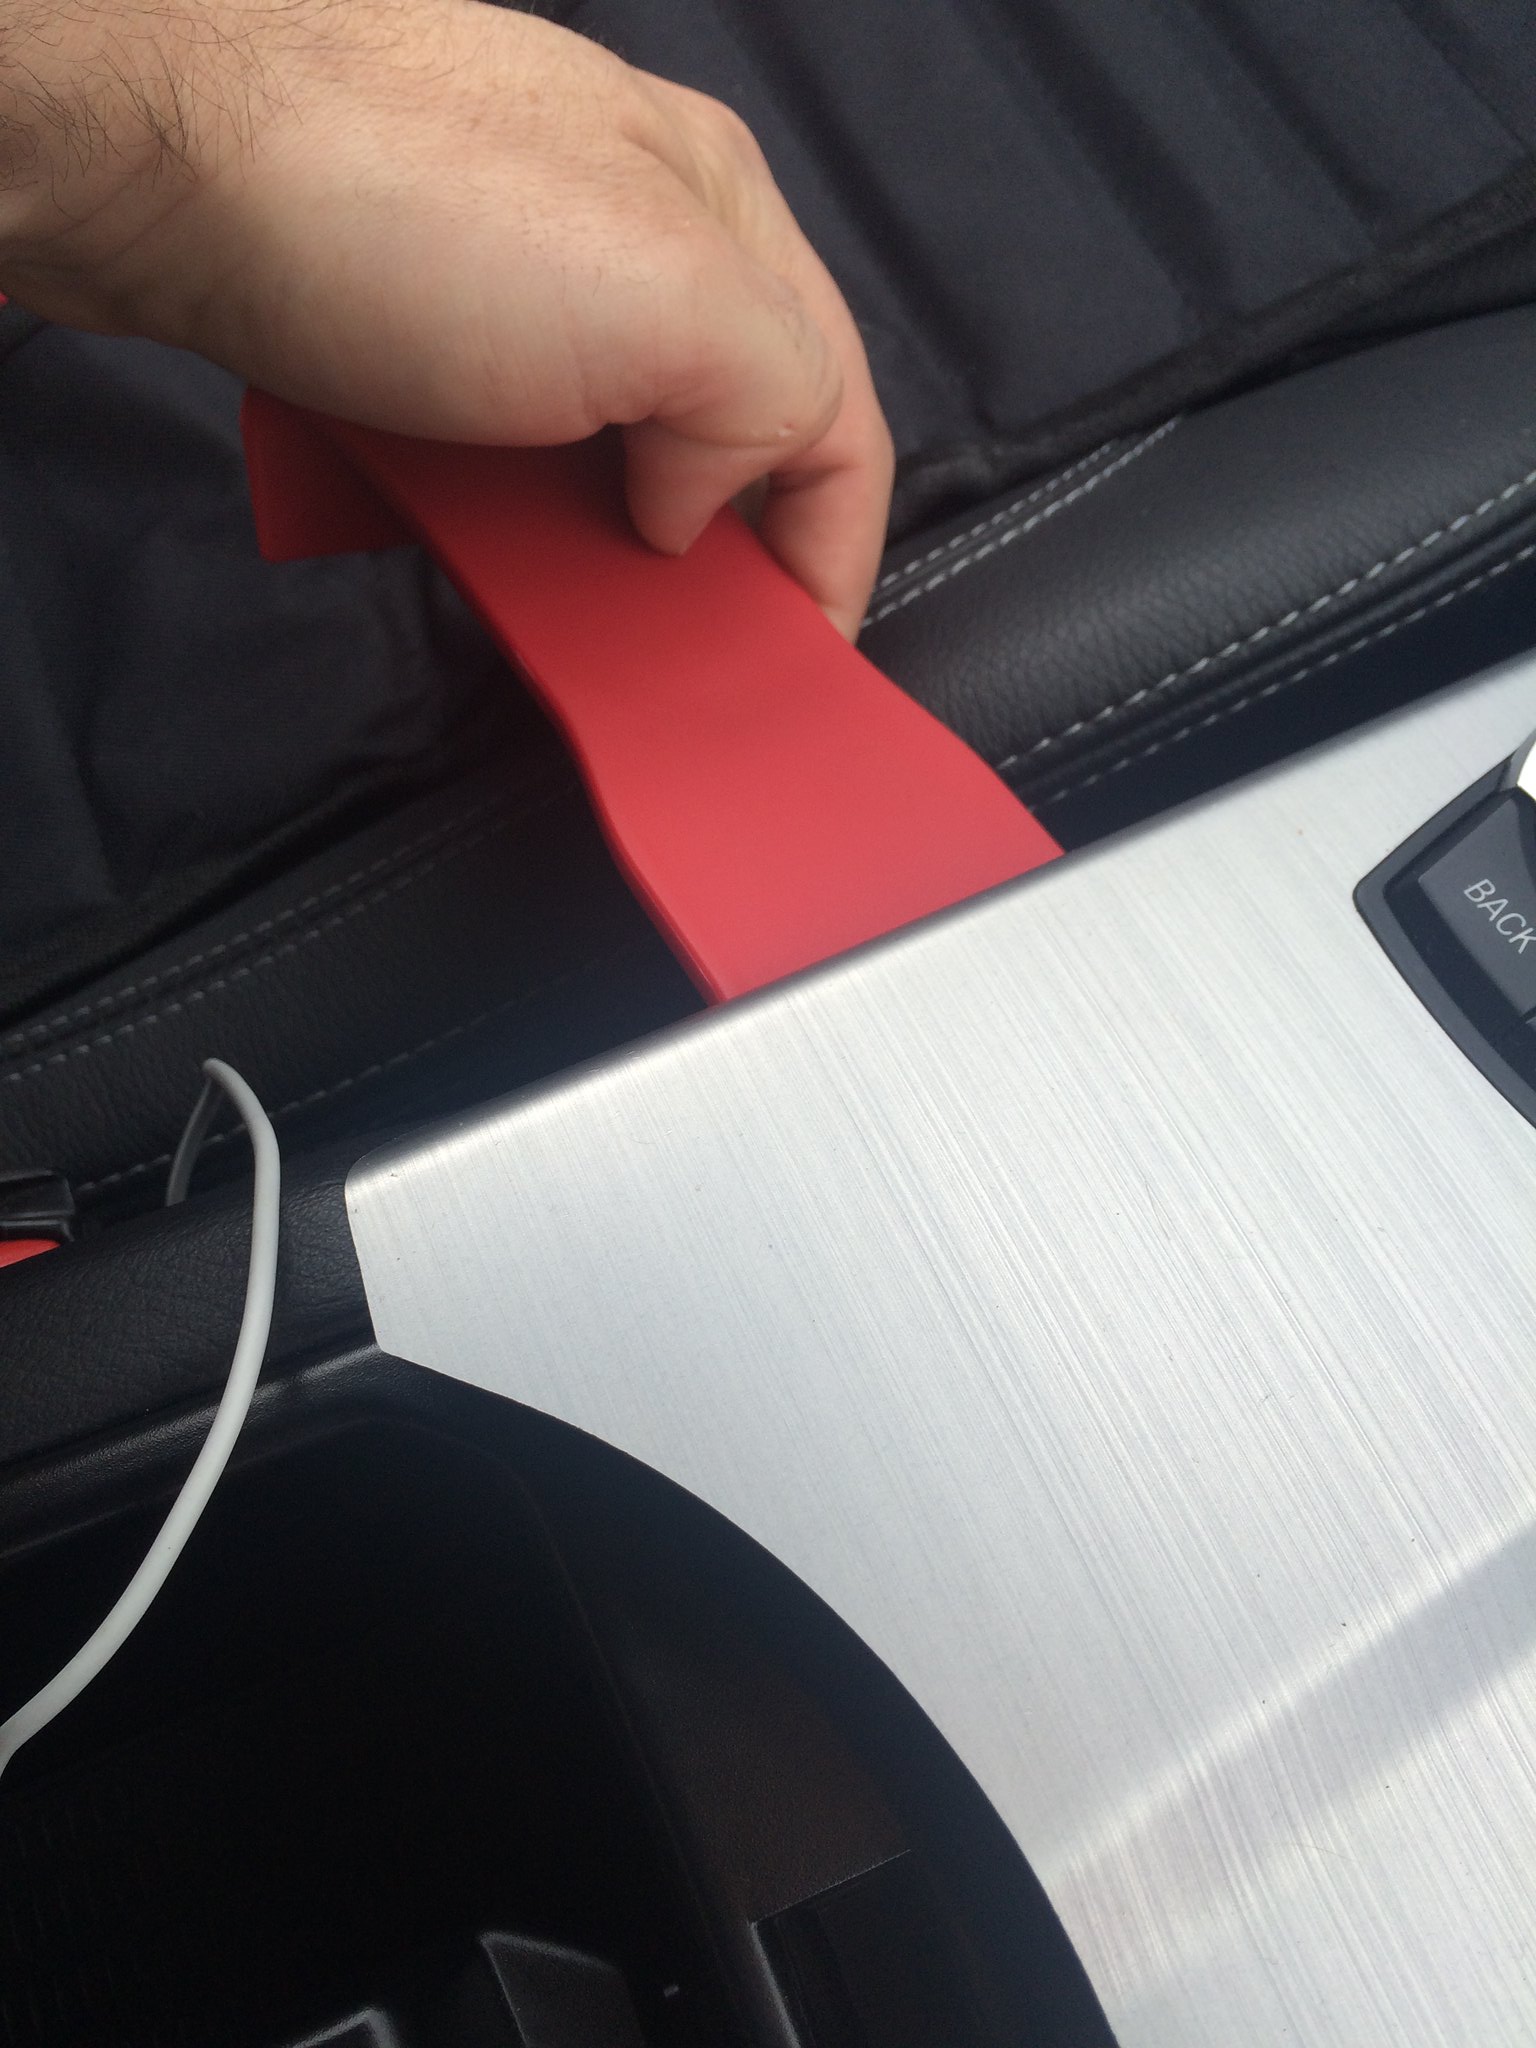 then lift the trim up slowly, this will reveal the 3 connectors connecting the iDrive and other fittings on the trim. 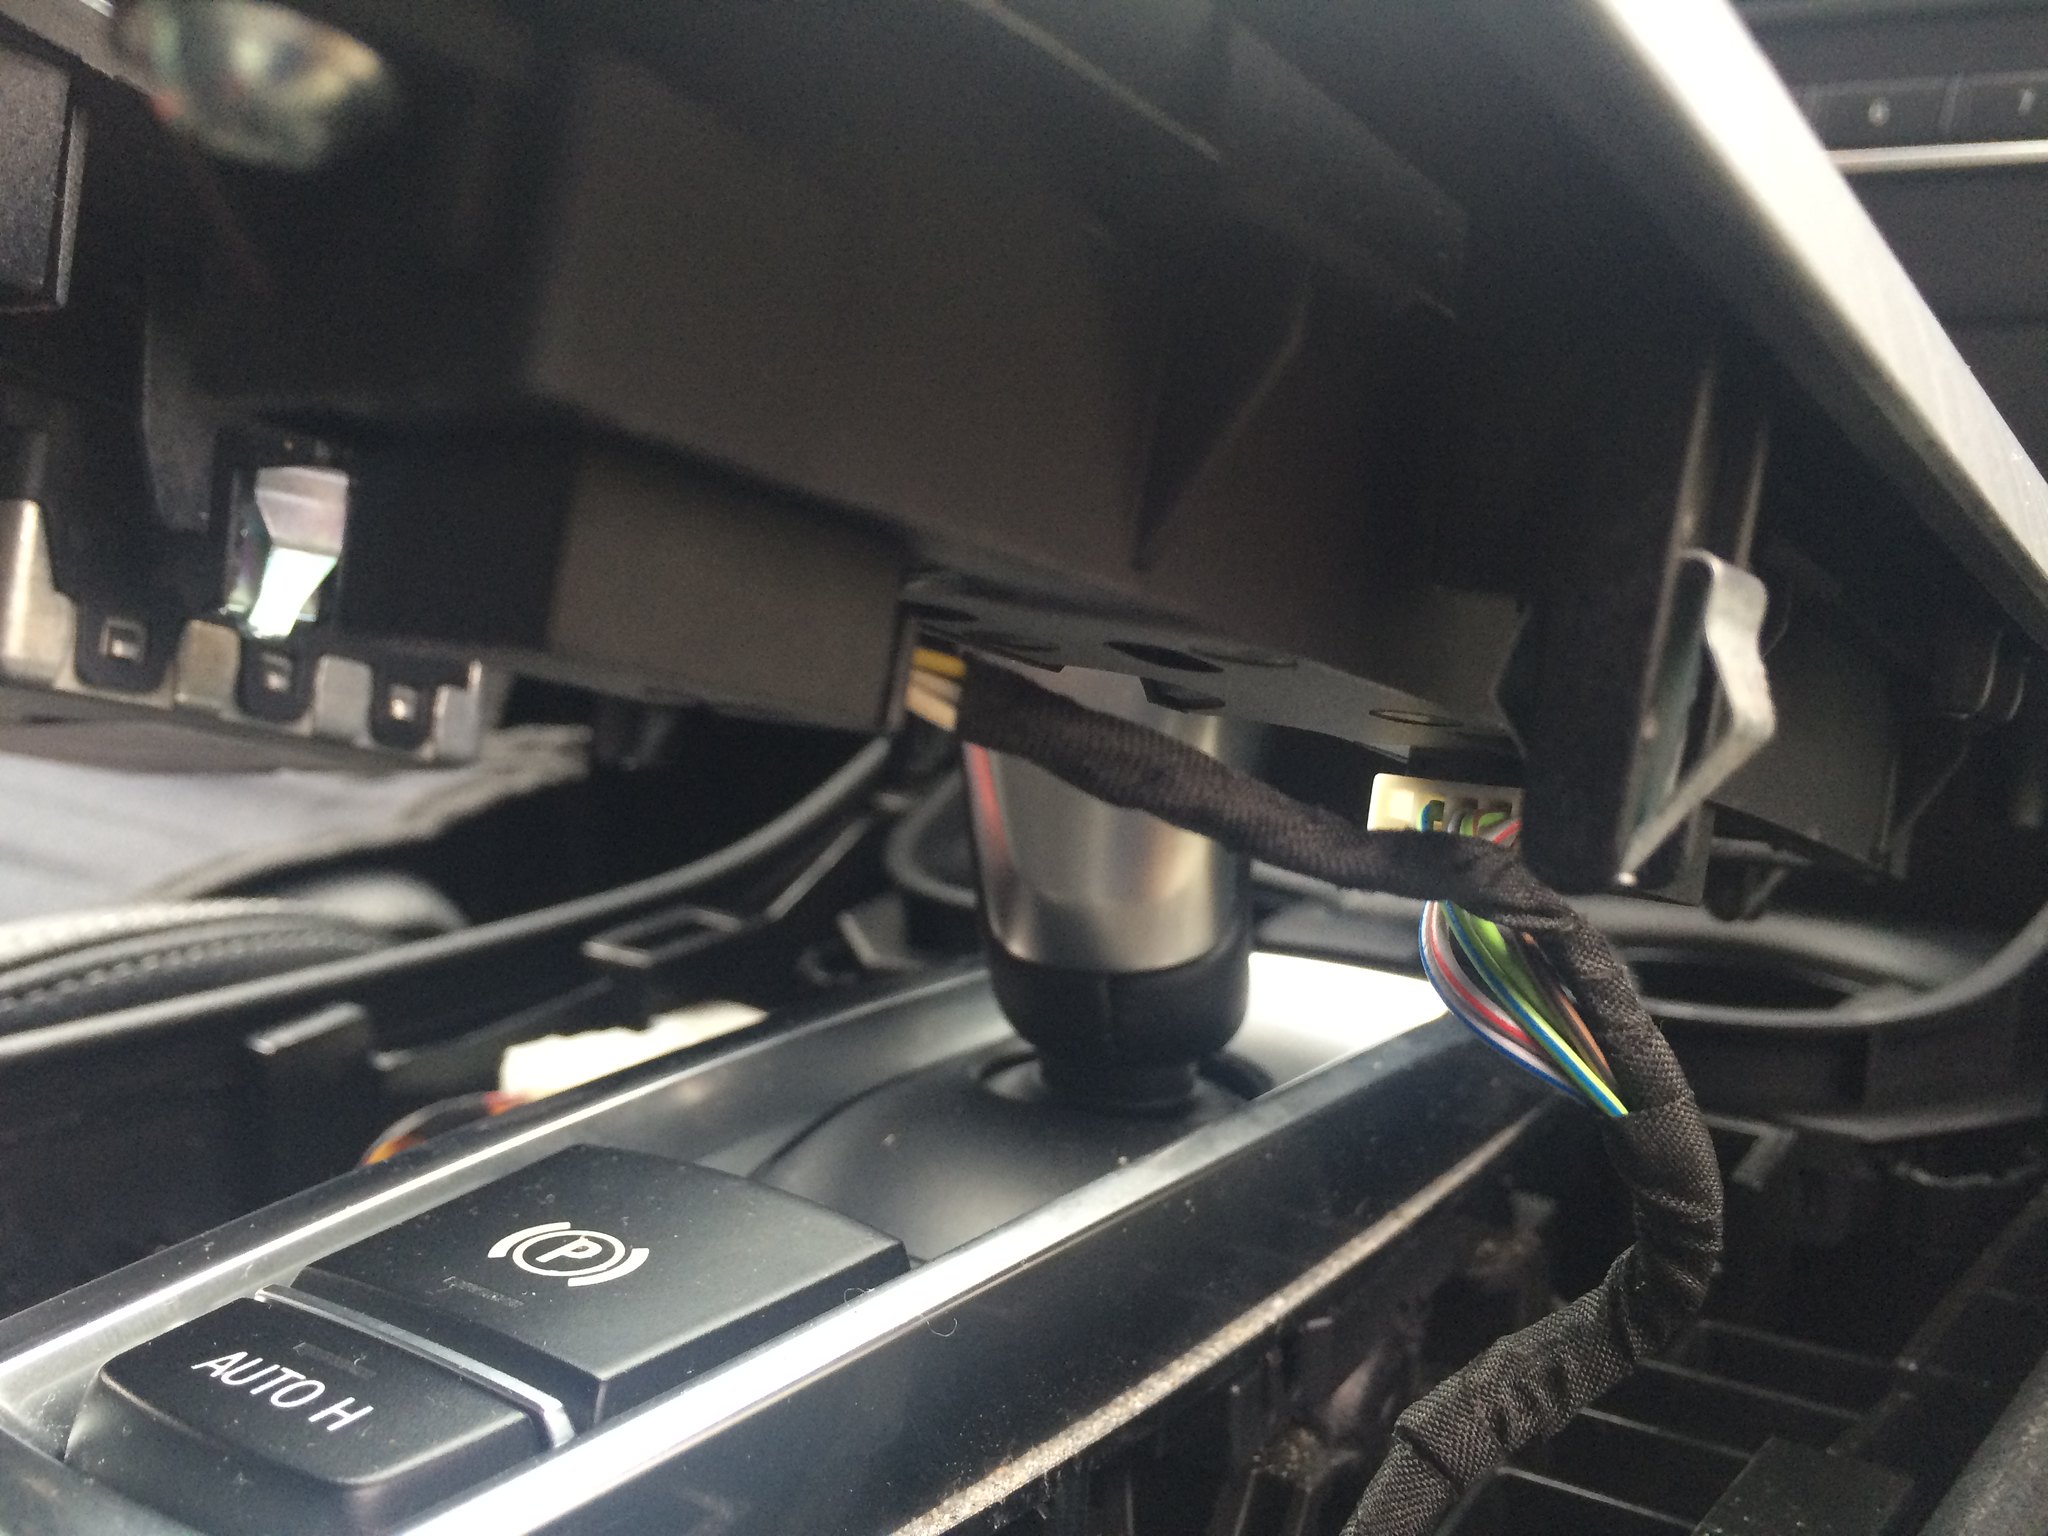 now begin to unclip the connectors  here 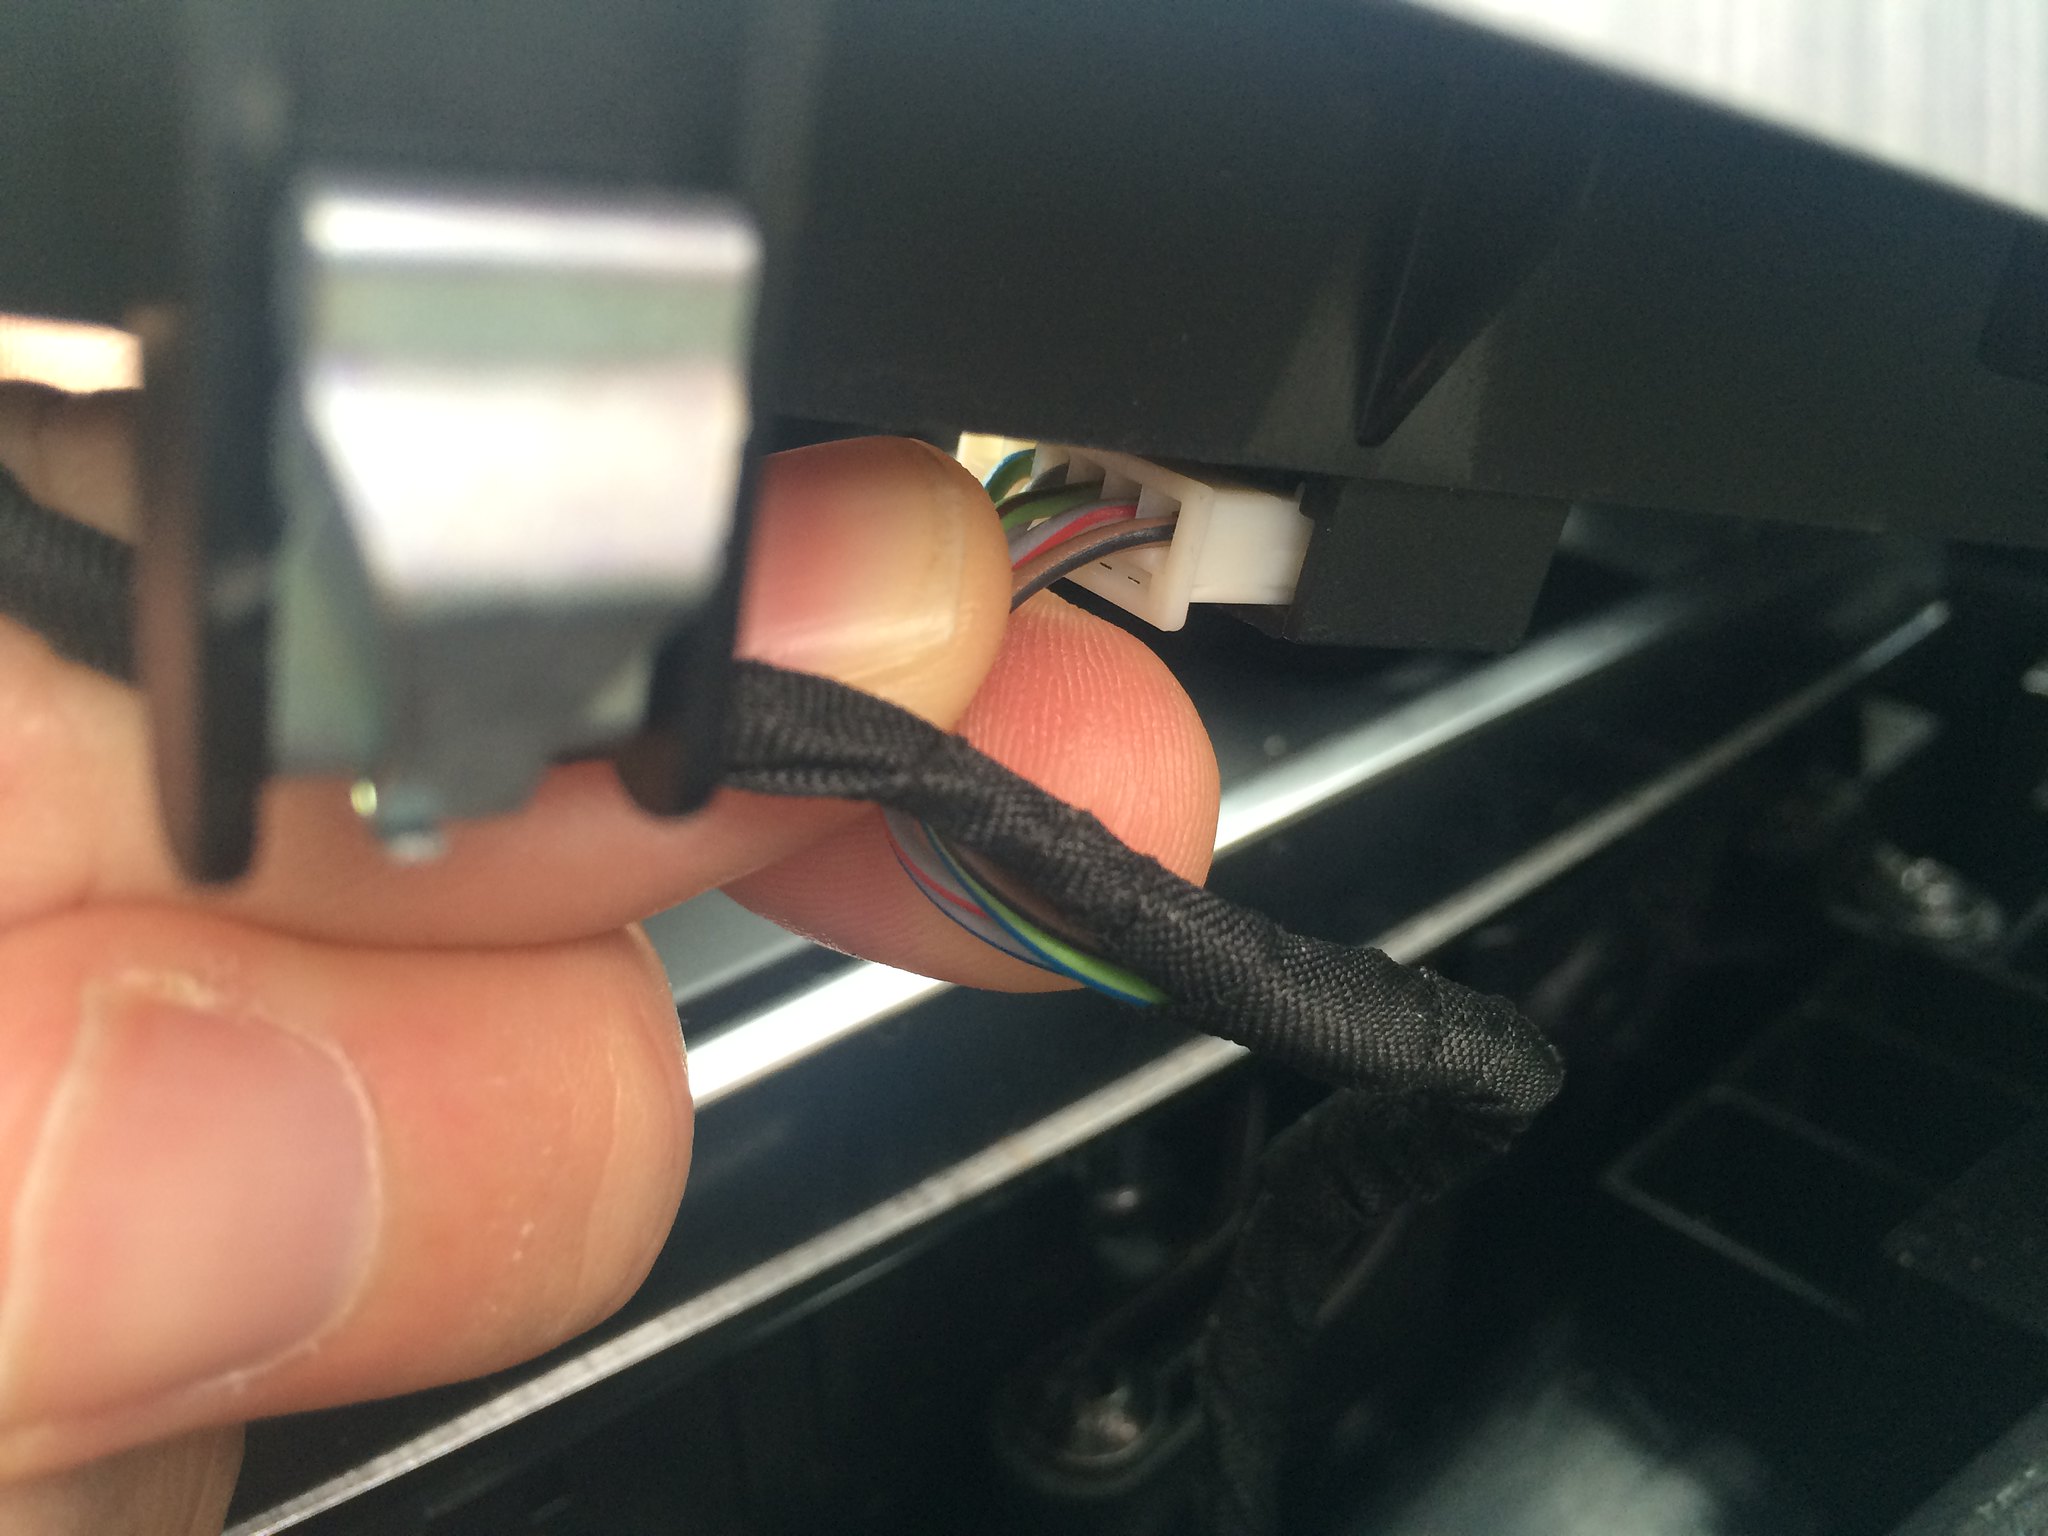 here 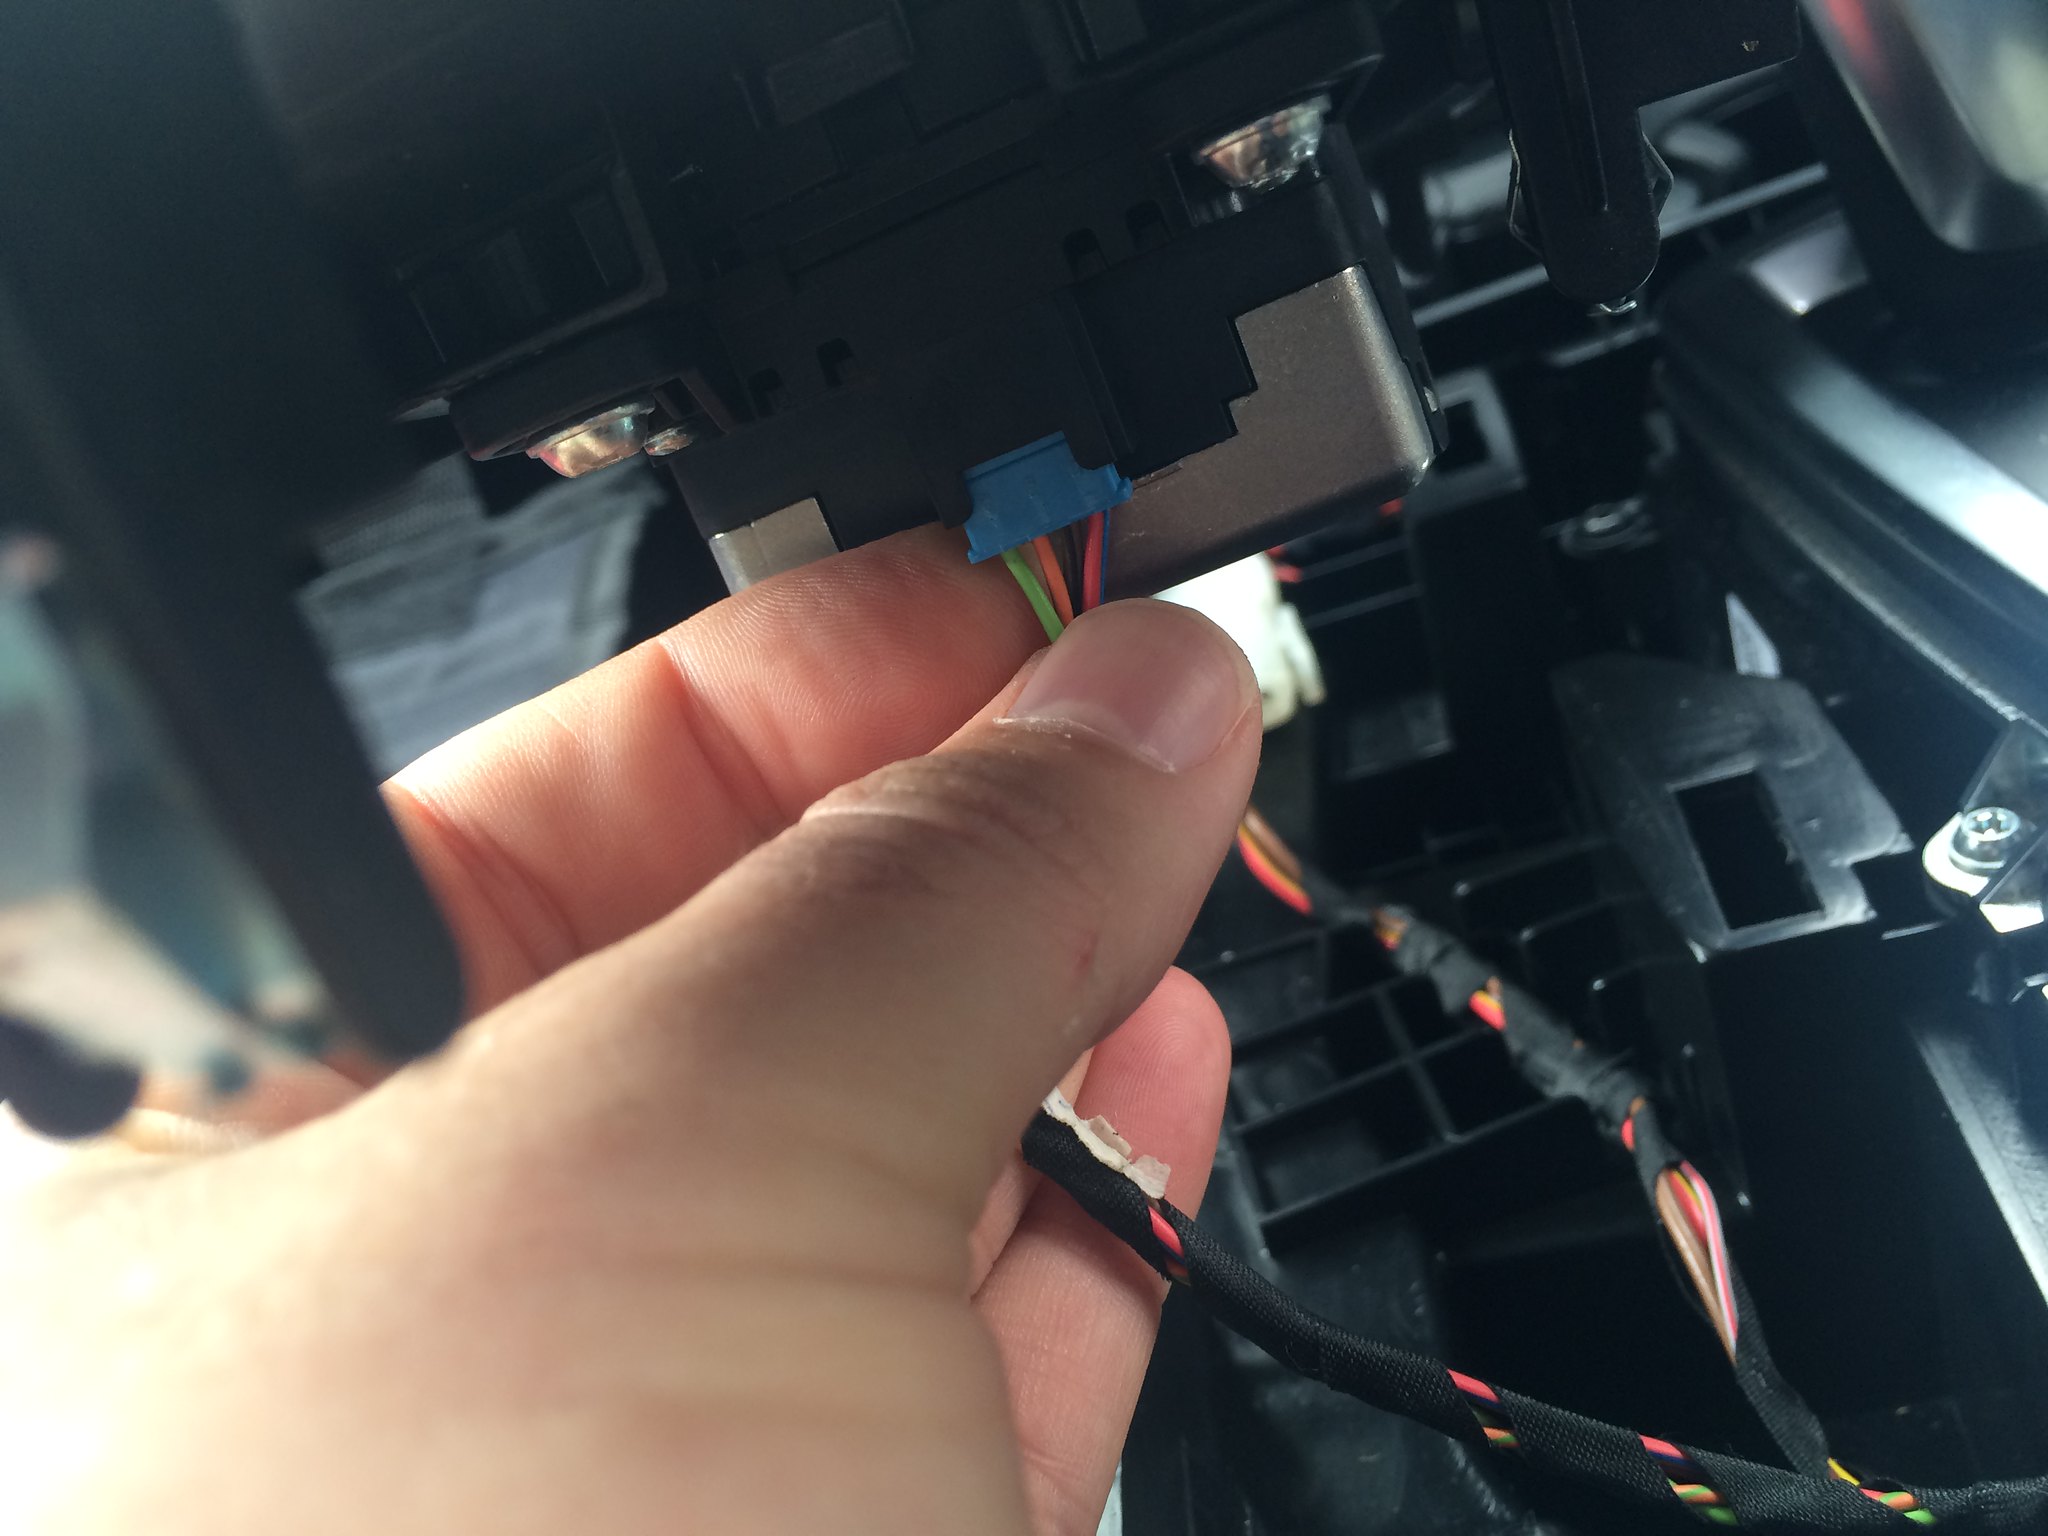 some of these were a little tight but gentle tug moved them all with little fuss. leaving you with this, you should be able to see the clip points for the trim to work out where to pry etc.. [IMG]http://i225.photobucket.com/albums/d...9FC559339D.jpg[/IMG] and the back of the trim [IMG]http://i225.photobucket.com/albums/d...3F1024B3A0.jpg[/IMG] now remove the small rubber insert at the bottom of the cup holder [IMG]http://i225.photobucket.com/albums/d...5018BE227E.jpg[/IMG] revealing these bolts, you only need remove the centre one, T20 Torx bit [IMG]http://i225.photobucket.com/albums/d...B4D9C6C659.jpg[/IMG] under the top rubber you should be able to see the push clips [IMG]http://i225.photobucket.com/albums/d...7D6DC28DB3.jpg[/IMG] and here [IMG]http://i225.photobucket.com/albums/d...26426E08E8.jpg[/IMG] you need not do anything with these, just good to know how they look and how they release (pulling up) close up below of one [IMG]http://i225.photobucket.com/albums/d...9CF1000079.jpg[/IMG] then remove the from lower plastic, again this just unclips by pulling down, used dry palm of hand to push down pop off. be careful here as there is the amber down light fixed to the back.. [IMG]http://i225.photobucket.com/albums/d...8EDF4CD8E5.jpg[/IMG] seen here [IMG]http://i225.photobucket.com/albums/d...16A65F2504.jpg[/IMG] this simply unclips, do this carefully, observe the clips to see how it fits [IMG]http://i225.photobucket.com/albums/d...AD4EECD0A6.jpg[/IMG] then tuck the wire to the side out of the way so it doesnt trap the cup holder when removing [IMG]http://i225.photobucket.com/albums/d...E5CE4F1AD0.jpg[/IMG] now the more strenuous bit, pull the rear of the cup holder up so it pops the rear clips [IMG]http://i225.photobucket.com/albums/d...70488EDCC2.jpg[/IMG] then lift the front section of the cup holder up, pay attention to each side, you will see location guides [IMG]http://i225.photobucket.com/albums/d...B7CB475728.jpg[/IMG] Tricky part no 1. this part took a bit of giggling to get it to move, basically once the clips are free at the rear when you lift the front it leavers its self out of the slot, it does go with a pop (i almost thought i broken it) [IMG]http://i225.photobucket.com/albums/d...B7CB475728.jpg[/IMG] Now undo the power connector which feed the 12v socket and led (note new socket doesn't illuminate ) [IMG]http://i225.photobucket.com/albums/d...E5EB60016D.jpg[/IMG] and the new RHD cup holder [IMG]http://i225.photobucket.com/albums/d...E5462BF2E1.jpg[/IMG] Mmmm i love the smell of new plastic in the morning lol [IMG]http://i225.photobucket.com/albums/d...78A29E24B0.jpg[/IMG] ok above you can see there is only 2 x wires on this unit, so we have to pop the pins out and put them in the old plug off the old 12v socket... here begins ... tricky part No 2, using a small flat headed screwdriver, force down the side of each pin to close up the small metal clips that hold it in its socket. there is also a small plastic insert on the rear which needs to be popped out also, in theory you could actually cut these connector as you wont be using it again, or simply scotch block (electrical connector block the wires together in both sides and save about 10 mins, your call [IMG]http://i225.photobucket.com/albums/d...CD2A69F5F0.jpg[/IMG] once removed [IMG]http://i225.photobucket.com/albums/d...A0F4264E86.jpg[/IMG] both free [IMG]http://i225.photobucket.com/albums/d...2F55B56DCE.jpg[/IMG] now grab the old cup holder and remove the pins from that connector, here there are 3 wires, the 3rd runs a small led which illuminates the 12v socket, this part of the connector will be redundant as there is no led on the newer unit (one hand gives, the other BMW hand takes away), i thought at this point you could possibly drill in a small 1/8" hole on the newer unit and reuse the led, simply mounting it with some super glue, this could work well (LED is same as the one pictured above in the from lower fascia) let me know if anyone tries this [IMG]http://i225.photobucket.com/albums/d...F5AD632F7A.jpg[/IMG] the insert at the back [IMG]http://i225.photobucket.com/albums/d...A1F3B5C5ED.jpg[/IMG] now discard the old unit and wires and grab the new cup holder wires and flick out the small metal retaining clips to hold into the connector once inserted.. [IMG]http://i225.photobucket.com/albums/d...D0F5135273.jpg[/IMG] small knife or Stanley blade does this quite well [IMG]http://i225.photobucket.com/albums/d...ECCFBAEB2F.jpg[/IMG] as i'm not reusing the plastic insert i simply used some electrical tape to insulate it from the other wire in the connector, once done pop them into the old 3 pin connector, matching up the wiring (brown to brown) [IMG]http://i225.photobucket.com/albums/d...F9EC966663.jpg[/IMG] now we begin the reverse of the install.. [IMG]http://i225.photobucket.com/albums/d...C24996C72A.jpg[/IMG] the unit sloted in quite easily, notice the clips either side that hang over the plastic lugs (note: these are not on the old holder) they caused no problem with the fit, in fact make it more stable and line the unit up [IMG]http://i225.photobucket.com/albums/d...09C5CB311C.jpg[/IMG] now remove the rear rubber on the new cup holder and line up the rear clips into the new holes (*note there are 4 holes on this new unit, i can only think this if for the change over year and/or X4) take your time here and make sure everything fits snug, lines up correctly before popping it all back down [IMG]http://i225.photobucket.com/albums/d...828EFF1B97.jpg[/IMG] close up of holes/clips [IMG]http://i225.photobucket.com/albums/d...AC74DB2A9B.jpg[/IMG] little bit fiddly again locating things but take your time, and with a little force (again i thought id broken something) the unit just pops in place! once in there is a little bit of movement, line up the hole and pop in the T20 screw .. [IMG]http://i225.photobucket.com/albums/d...B0087BDAF8.jpg[/IMG] clearer picture of one of the side lugs/clips [IMG]http://i225.photobucket.com/albums/d...8AF50A5225.jpg[/IMG] refit the led and fascia [IMG]http://i225.photobucket.com/albums/d...AD4EECD0A6.jpg[/IMG] [IMG]http://i225.photobucket.com/albums/d...FFE0C708FC.jpg[/IMG] clip the 12v wire together, matching colours (colors for the Americans lol) like for like, (Note: only 2 wires in the new loom now ) [IMG]http://i225.photobucket.com/albums/d...5C2F2763D3.jpg[/IMG] now for the lower rubber insert [IMG]http://i225.photobucket.com/albums/d...2114E032D1.jpg[/IMG] here [IMG]http://i225.photobucket.com/albums/d...D65F5C58FC.jpg[/IMG] And fitted [IMG]http://i225.photobucket.com/albums/d...5D3568BD62.jpg[/IMG] now reverse the guide for clipping the wires back in and trim back on, everything should just pop back into place, with the odd pat of the palm of your hand to send the clips back home. again take your time line up the clips and don't forget to connect the 3 wires for the iDrive connector/parking break etc... then sit back and admire your handy work [IMG]http://i225.photobucket.com/albums/d...3147178351.jpg[/IMG] once completed, only you and fellow forum members will appreciate the monumental task you have just undertaken. wife or partner will not understand the sore fingers, scuffed knuckles, and money spent...best to say nothing and keep it on here  hope you like the above... hope you like the above...it almost certainly looks better, and a definite must do upgrade for the earlier F25's, there is slightly less height on the back section as my sun glasses no longer fit, but this is fine as they can easily sit on top of the new draw... Funny how such a simple small mod changes the interior space so much, love this mod! good luck and let me know if any one wants a LHD version  Last edited by TK - 421; 07-22-2017 at 10:35 AM.. |
| 08-20-2015, 02:40 PM | #4 |
|
Yorkshireman trapped in a Berkshire postcode
11
Rep 213
Posts |
Excellent - what attention to detail!! Thanks
__________________
X3 3.0d M-Sport
Mini Countryman Cooper S ALL4 |
|
Appreciate
0
|
| 08-21-2015, 10:49 AM | #5 | |
|
There's a storm coming
252
Rep 596
Posts
Drives: BMW Vader
Join Date: May 2008
Location: UK
iTrader: (0)
Garage List 2020 BMW M135i xDrive [0.00]
2019 BMW G05 M Spor ... [0.00] 2018 540i M Sport X ... [0.00] 2018 BMW 540i M Spo ... [0.00] |
Quote:
|
|
|
Appreciate
0
|
| 08-21-2015, 01:41 PM | #7 | |
|
There's a storm coming
252
Rep 596
Posts
Drives: BMW Vader
Join Date: May 2008
Location: UK
iTrader: (0)
Garage List 2020 BMW M135i xDrive [0.00]
2019 BMW G05 M Spor ... [0.00] 2018 540i M Sport X ... [0.00] 2018 BMW 540i M Spo ... [0.00] |
Quote:
 |
|
|
Appreciate
0
|
| 08-24-2015, 05:47 AM | #10 | |
|
Air Vice Marshall
256
Rep 1,639
Posts
Drives: X1 LCI xDrive 2.0i M Sport
Join Date: Nov 2014
Location: Somewhere in Blighty (UK)
|
Quote:
Anygreg Excellent write up. Thanks very much. |
|
|
Appreciate
0
|
| 08-24-2015, 05:51 AM | #11 | |
|
There's a storm coming
252
Rep 596
Posts
Drives: BMW Vader
Join Date: May 2008
Location: UK
iTrader: (0)
Garage List 2020 BMW M135i xDrive [0.00]
2019 BMW G05 M Spor ... [0.00] 2018 540i M Sport X ... [0.00] 2018 BMW 540i M Spo ... [0.00] |
Quote:
|
|
|
Appreciate
0
|
| 08-25-2015, 01:41 AM | #13 | |
|
There's a storm coming
252
Rep 596
Posts
Drives: BMW Vader
Join Date: May 2008
Location: UK
iTrader: (0)
Garage List 2020 BMW M135i xDrive [0.00]
2019 BMW G05 M Spor ... [0.00] 2018 540i M Sport X ... [0.00] 2018 BMW 540i M Spo ... [0.00] |
Quote:
Use any BMW dealership |
|
|
Appreciate
0
|
| 05-05-2017, 01:10 AM | #15 |
|
There's a storm coming
252
Rep 596
Posts
Drives: BMW Vader
Join Date: May 2008
Location: UK
iTrader: (0)
Garage List 2020 BMW M135i xDrive [0.00]
2019 BMW G05 M Spor ... [0.00] 2018 540i M Sport X ... [0.00] 2018 BMW 540i M Spo ... [0.00] |
I actually still do have the LHD version boxed up as new in storage
|
|
Appreciate
0
|
| 05-05-2017, 04:30 AM | #16 |
|
Second Lieutenant
 49
Rep 219
Posts |
Good write up but that's the easy bit - not try and find some tubs that fit in the cupholders that still allow the slider to pass over.....

__________________
Now - LC1 20d Carbon Black
Gone - F25 20d Space Grey |
|
Appreciate
0
|
| 07-12-2017, 02:46 AM | #17 |
|
There's a storm coming
252
Rep 596
Posts
Drives: BMW Vader
Join Date: May 2008
Location: UK
iTrader: (0)
Garage List 2020 BMW M135i xDrive [0.00]
2019 BMW G05 M Spor ... [0.00] 2018 540i M Sport X ... [0.00] 2018 BMW 540i M Spo ... [0.00] |
Guys will upload all the photos again once I've sorted my photo library out and uploaded to a Suitable hoster
|
|
Appreciate
1
AMCross2.00 |
| 07-20-2017, 08:38 PM | #19 | |
|
Colonel
 
628
Rep 2,808
Posts |
Quote:
 Guess you haven't heard... Photobucket is not supporting 3rd party hosting of pics anymore. Guess you haven't heard... Photobucket is not supporting 3rd party hosting of pics anymore. |
|
|
Appreciate
0
|
| 07-21-2017, 01:21 AM | #20 | |
|
There's a storm coming
252
Rep 596
Posts
Drives: BMW Vader
Join Date: May 2008
Location: UK
iTrader: (0)
Garage List 2020 BMW M135i xDrive [0.00]
2019 BMW G05 M Spor ... [0.00] 2018 540i M Sport X ... [0.00] 2018 BMW 540i M Spo ... [0.00] |
Quote:
|
|
|
Appreciate
0
|
| 07-22-2017, 10:08 AM | #21 |
|
There's a storm coming
252
Rep 596
Posts
Drives: BMW Vader
Join Date: May 2008
Location: UK
iTrader: (0)
Garage List 2020 BMW M135i xDrive [0.00]
2019 BMW G05 M Spor ... [0.00] 2018 540i M Sport X ... [0.00] 2018 BMW 540i M Spo ... [0.00] |
Just tried to add the images through the app, unsuccessfully
 Still uploading my entire library to Flickr.. monumental task PB has a lot to answer for!  |
|
Appreciate
0
|
| 07-22-2017, 10:30 AM | #22 |
|
There's a storm coming
252
Rep 596
Posts
Drives: BMW Vader
Join Date: May 2008
Location: UK
iTrader: (0)
Garage List 2020 BMW M135i xDrive [0.00]
2019 BMW G05 M Spor ... [0.00] 2018 540i M Sport X ... [0.00] 2018 BMW 540i M Spo ... [0.00] |
Ok guys, so I've worked out a way to do this with Flickr, but it isn't a simp,e quick thing to do, so as and when I get time I'll keep updating each bit so we have the complete guide back up again
|
|
Appreciate
1
AMCross2.00 |
Post Reply |
| Bookmarks |
| Tags |
| f25 cup holder install |
|
|


