

Welcome to the ultimate BMW X3 community.
| 11-01-2018, 11:39 PM | #1 |
|
New Member

6
Rep 21
Posts |
[SCROLL BELOW FOR FIX]
I have a 2013 F25 2.8i X3 with passenger-side broken headlight clips. This is a drag as BMW apparently does not make replacement clips for these models. [They do make them but only for POST-April 2014 X25s, but not mine (Jan 2013)] As far as I can tell these lights are Bi-xenon headlight, and the right one is part no 63117276996 item according to Park Shore BMW. It seems like there are 3 variants of this headlight according to REAL OEM http://www.realoem.com/bmw/enUS/show...diagId=63_1257 1) Can anyone tell of these are Bi-Xenons or AHL-Xenons from the images below? 2) has anyone fabricated a part or found some solution that involves JB Weld etc to repair the broken clips? 1000 thanks ! Red arrows indicating both broken clips on passenger-side light 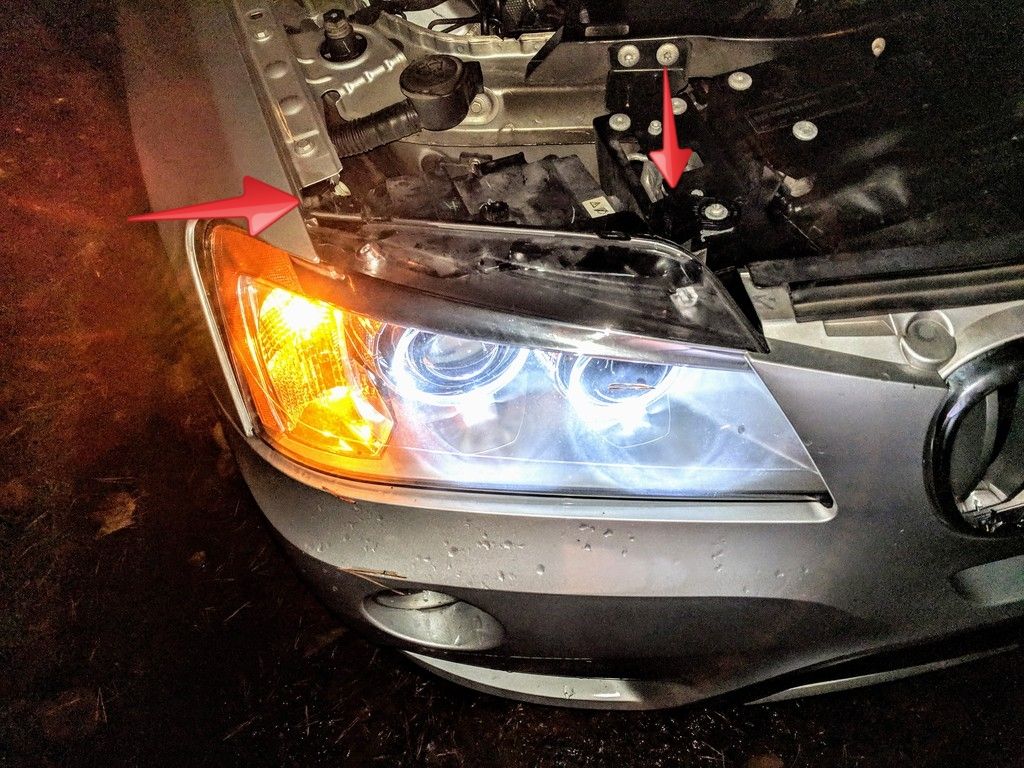 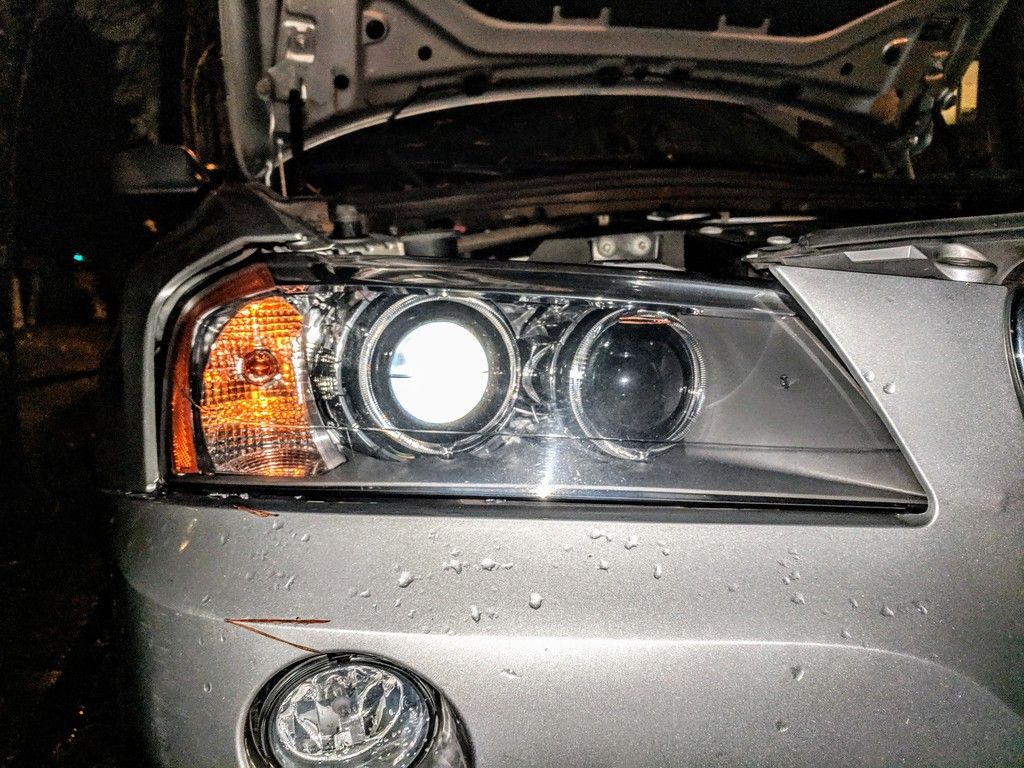 some labels on the driver's side headlight for info: 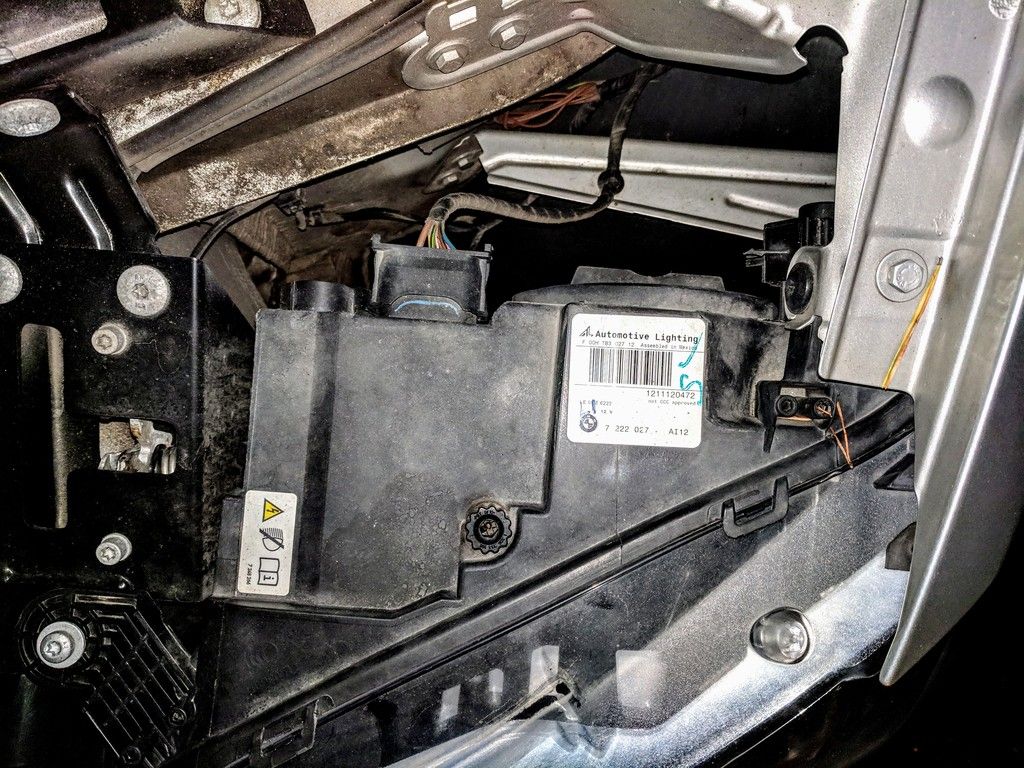 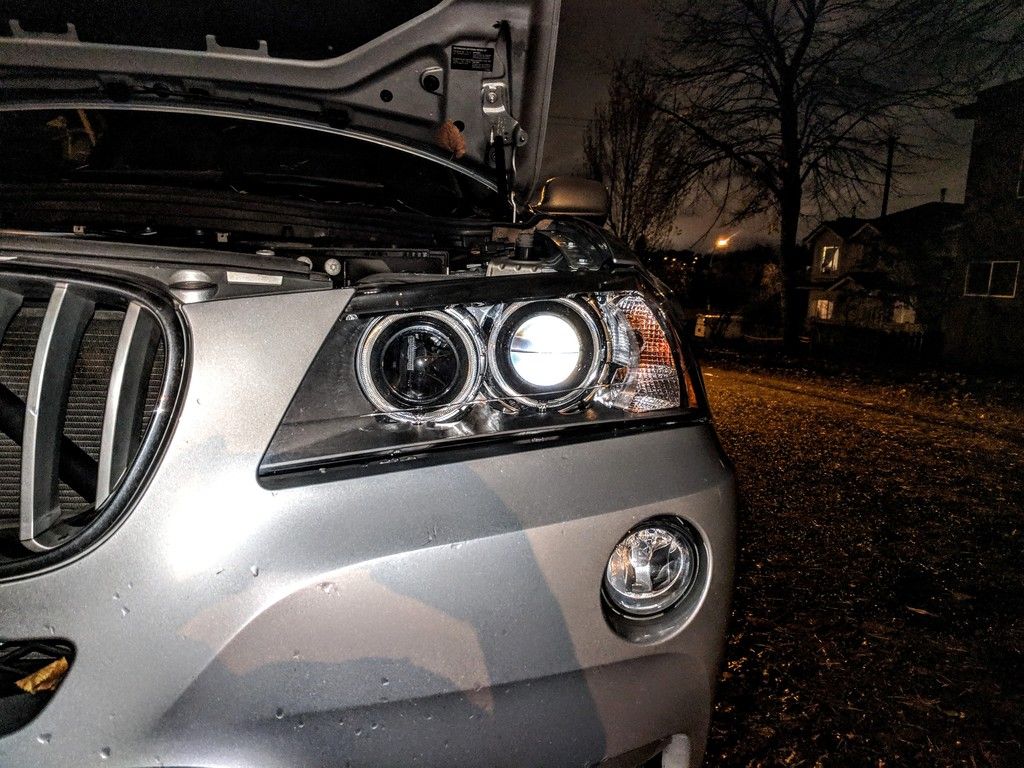 Last edited by thefys; 11-10-2018 at 05:26 PM.. |
| 11-08-2018, 08:46 AM | #2 |
|
Lieutenant General
 7444
Rep 11,857
Posts
Drives: MY24 G01 AW Msport
Join Date: Feb 2008
Location: L.I. NY
|
you have 2 options.
1) remove the headlight, repair it with poxy. plenty of youtube videos DIY 2) purchase new headlight assembly without bulbs/modules on ebay (cheaper). make sure the tabs are intact. you can transfer over the bulbs and modules. |
|
Appreciate
0
|
| 11-10-2018, 05:15 PM | #3 | |
|
New Member
6
Rep 21
Posts |
Quote:
on solution #2- replacement light ebay Q: Do you know if it's possible to switch out the lens of a light, using the tried and true bake-N-melt method? Thanks again Last edited by thefys; 11-10-2018 at 06:42 PM.. |
|
|
Appreciate
0
|
| 11-10-2018, 05:24 PM | #4 |
|
New Member
6
Rep 21
Posts |
REPAIR BOTH CLIPS METHOD - With photos
The clip near the center of the vehicle (CLIP 1) was broken at the base in two spots. It was glued with several consecutive thin coats of epoxy to build up strength. The epoxy of choice was Fast-Cure Sika AnchorFix + Static Mixer Home Depot $20 After the epoxy cured I did NOT crank down the screw clip, just a gentle snug. The clip closest to the turn signal (CLIP 2) was fabricated out of a Door threshold at Hope depot $20 I ended up fabricating CLIP 2 three times until I got it right. I used a jigsaw with a NEW metal blade, a few C clamps to hold it in place, goggles, gloves, metal files and a lot of caution. See photos for details. 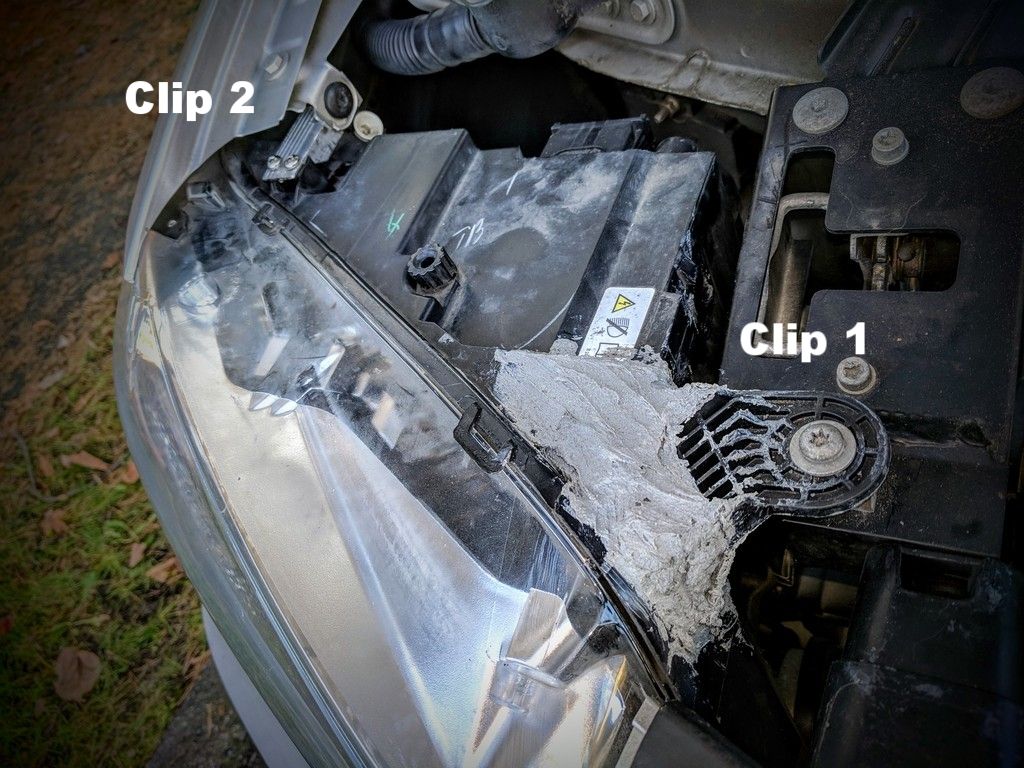 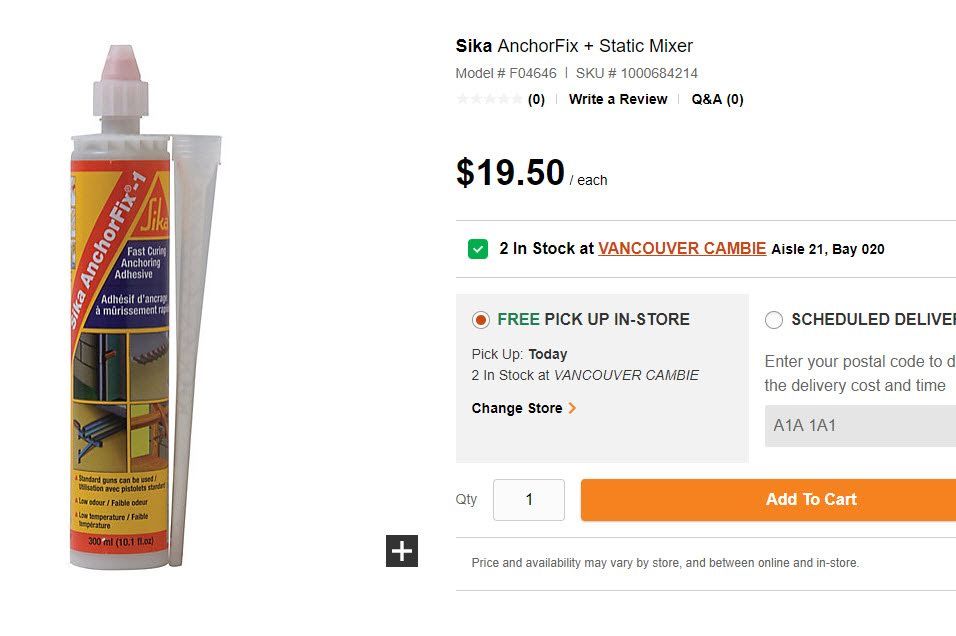 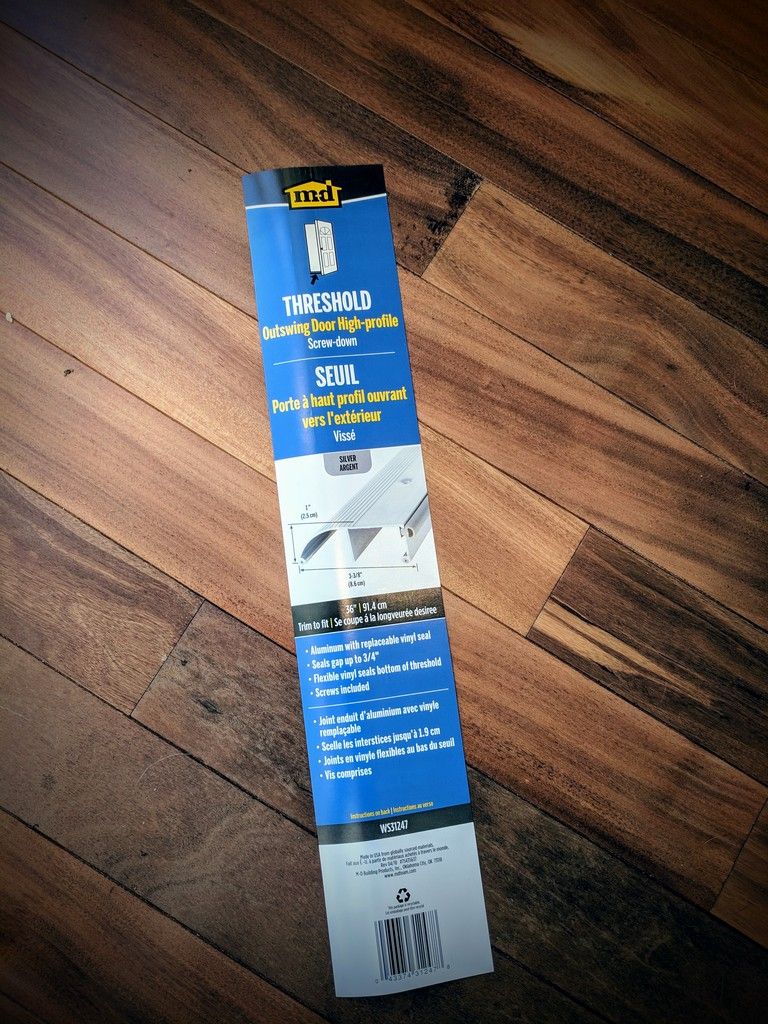 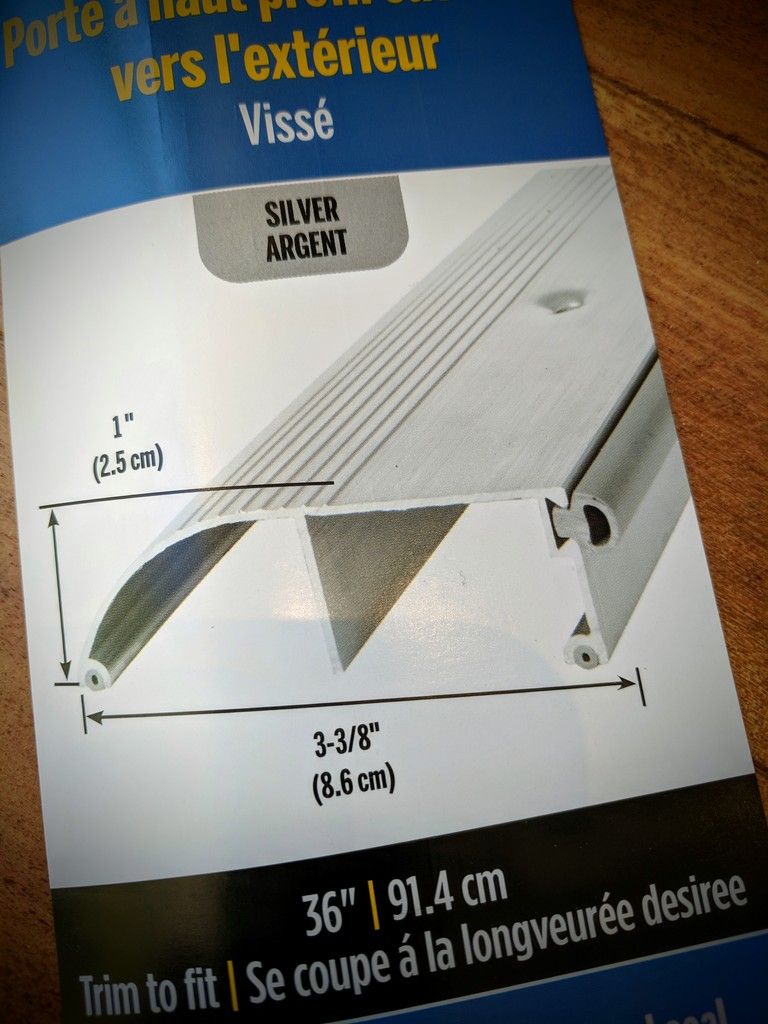 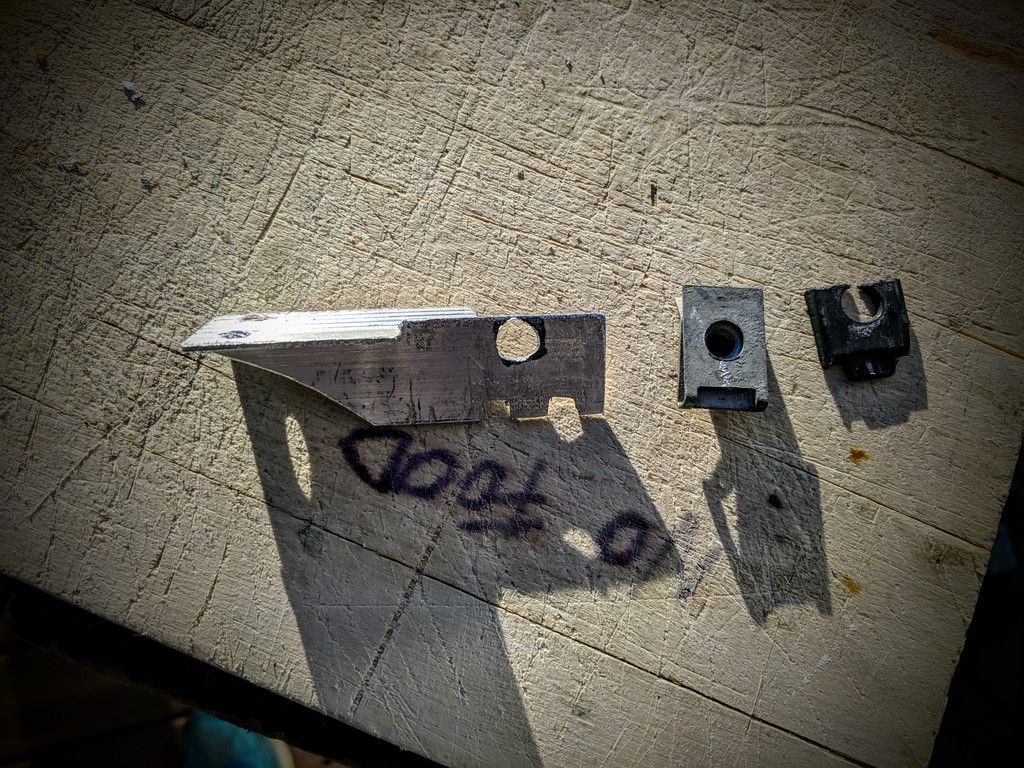 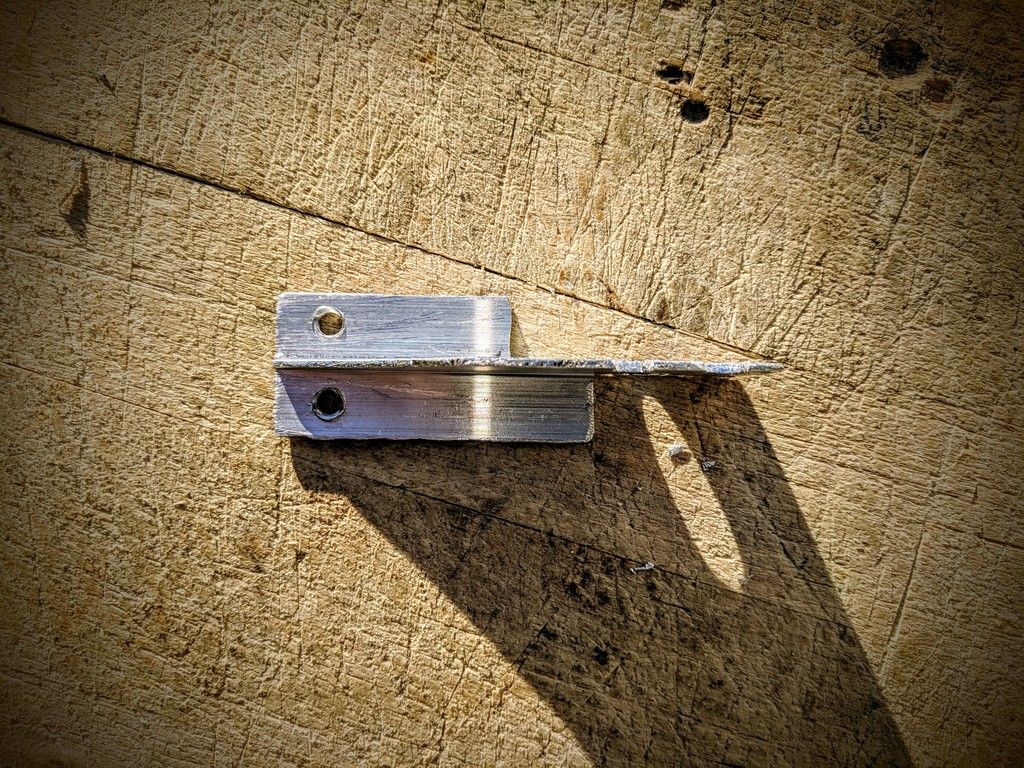  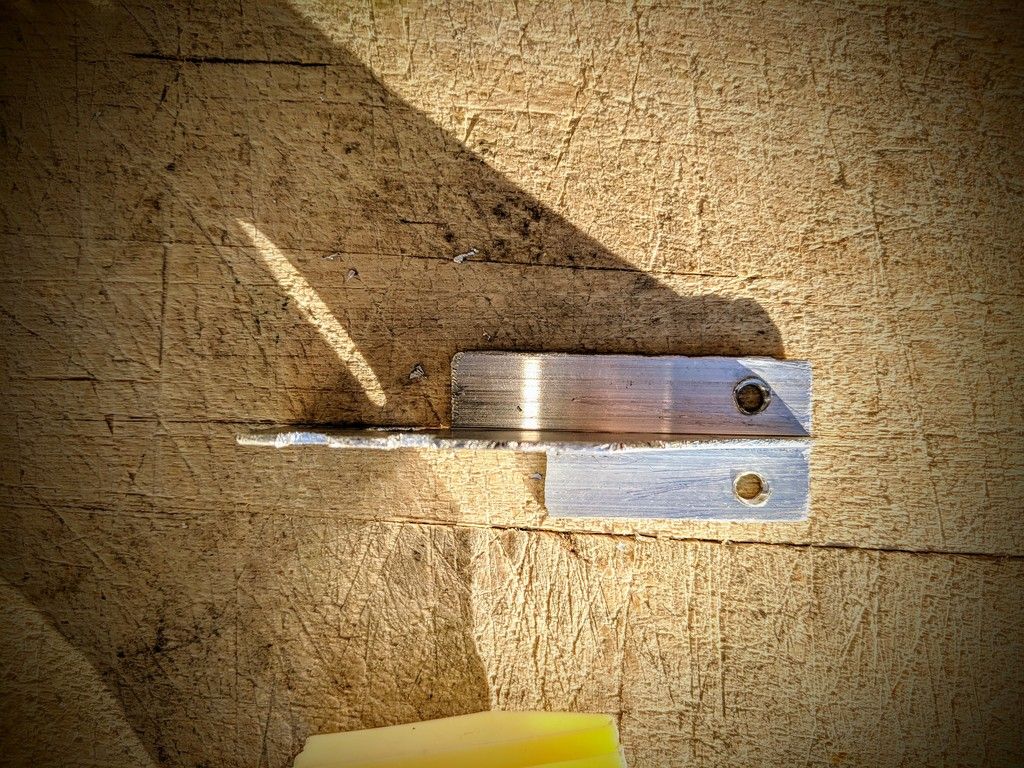 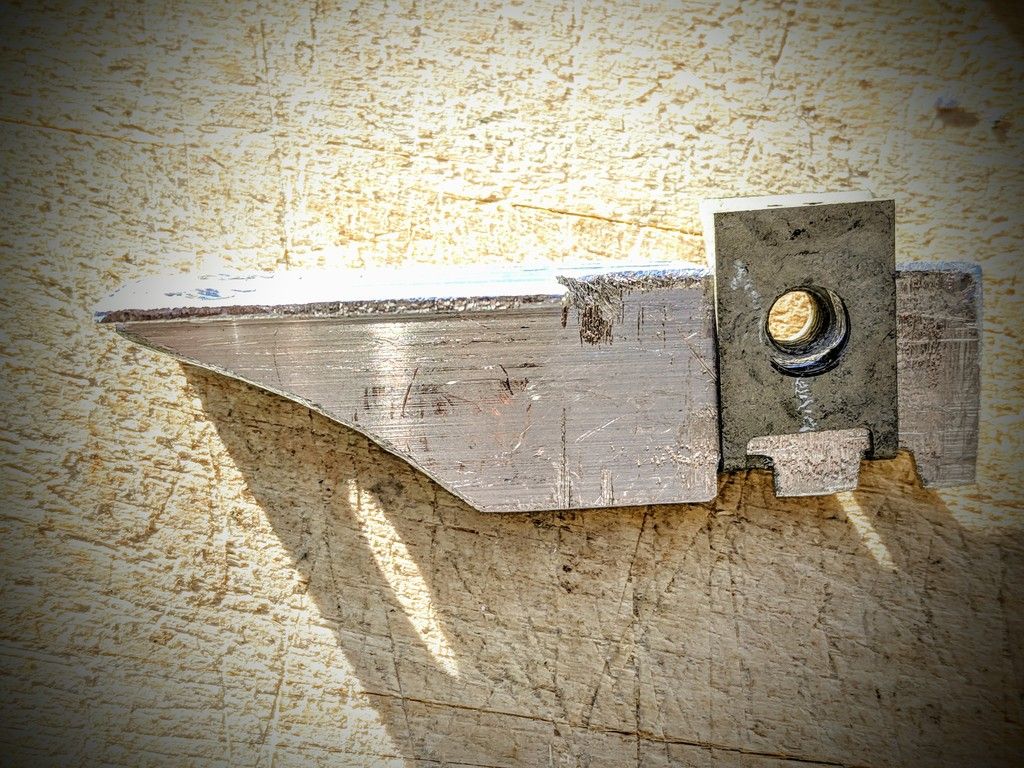 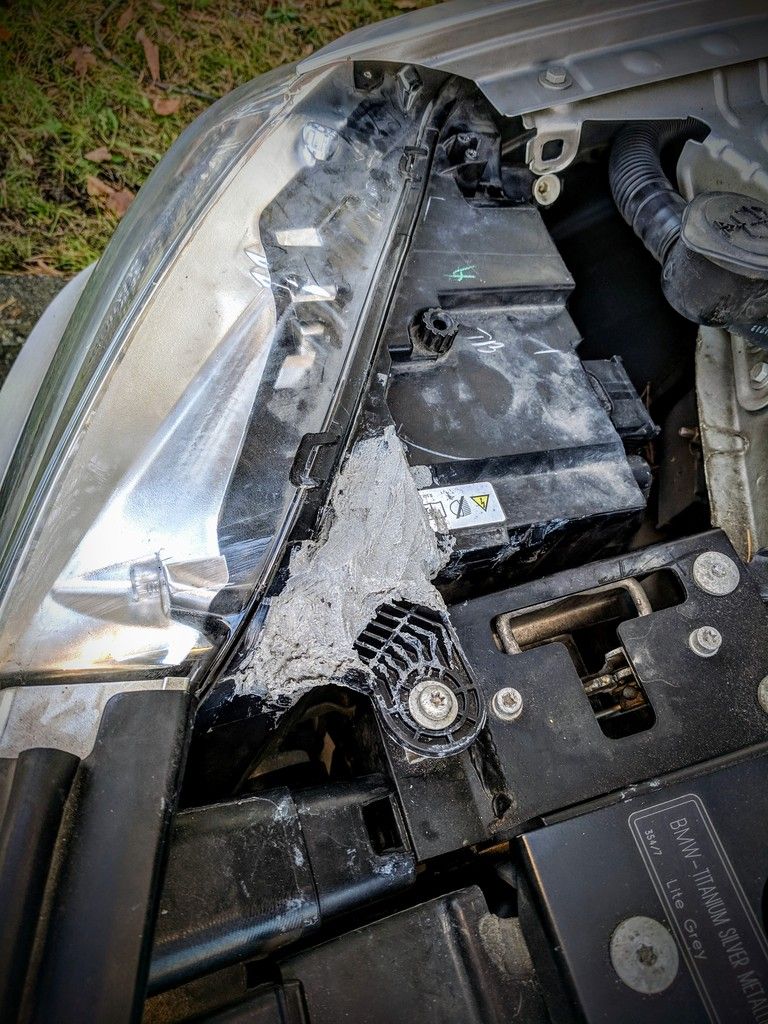 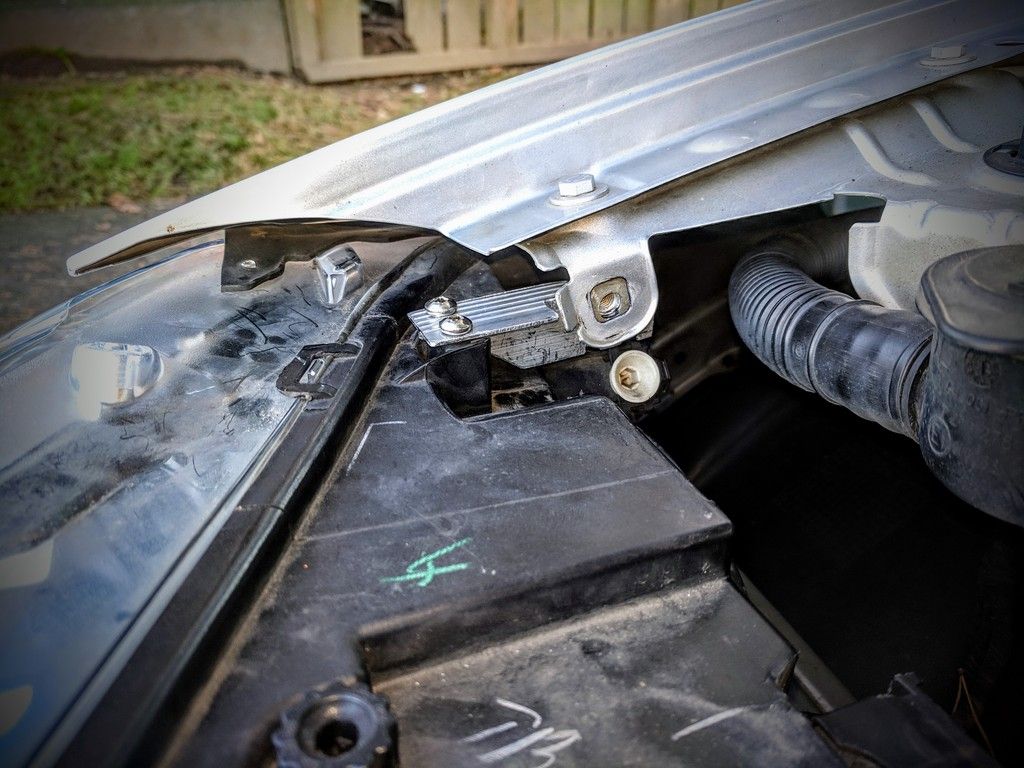 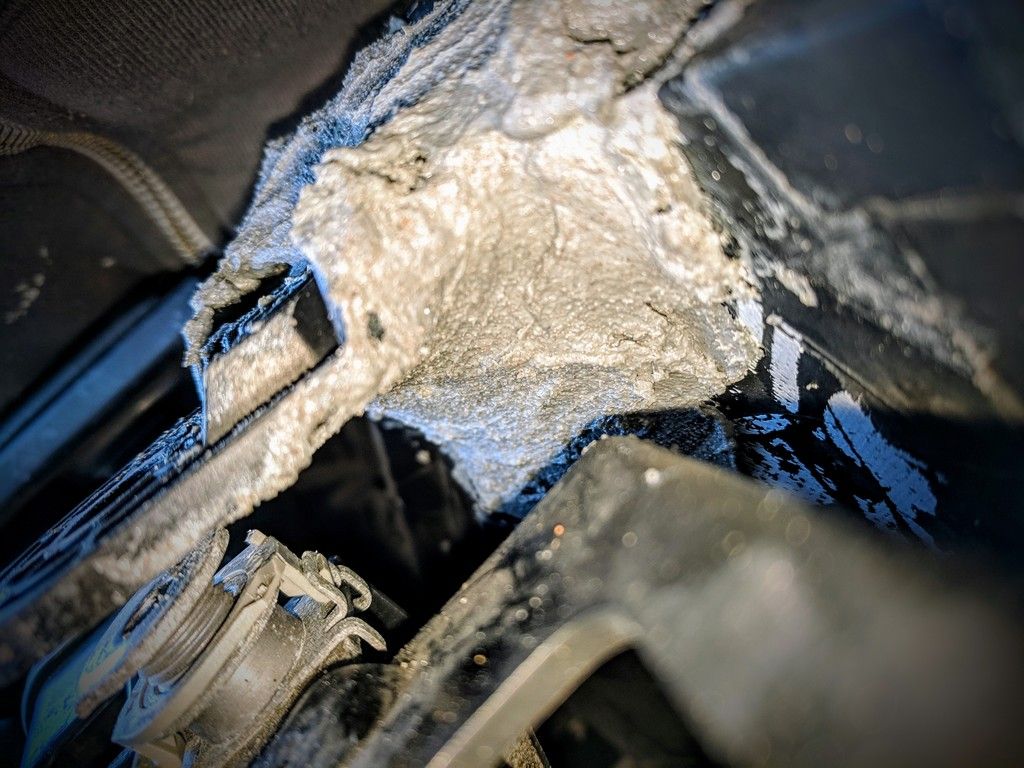 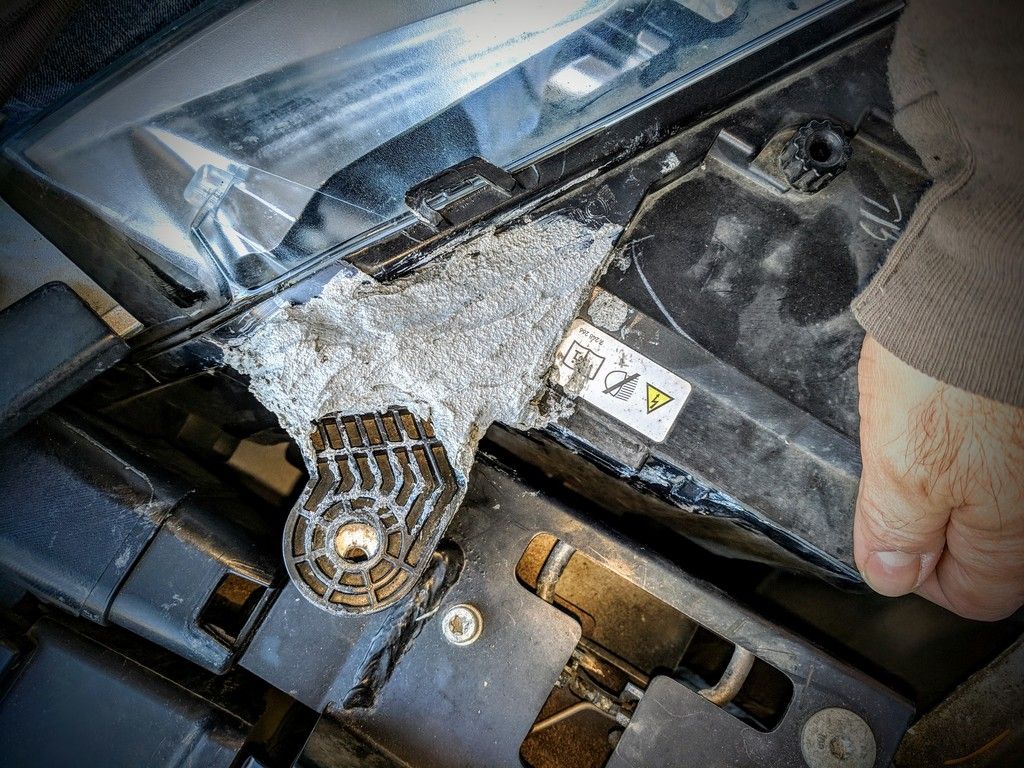 Last edited by thefys; 11-10-2018 at 06:44 PM.. |
|
Appreciate
0
|
| 11-10-2018, 09:07 PM | #5 | |
|
Lieutenant General
7444
Rep 11,857
Posts
Drives: MY24 G01 AW Msport
Join Date: Feb 2008
Location: L.I. NY
|
Quote:
Its a lot easier to buy headlight assembly |
|
|
Appreciate
0
|
| 11-10-2018, 09:55 PM | #6 | |
|
New Member
6
Rep 21
Posts |
Quote:
I guess I'm about to find out then cause I just bought a set with cracked/disstressed lenses ! |
|
|
Appreciate
1
________4163.50 |
| 11-10-2018, 10:18 PM | #7 | ||
|
________
4164
Rep 2,301
Posts |
Quote:
|
||
|
Appreciate
0
|
| 11-12-2018, 09:49 AM | #8 | |
|
Private First Class
 44
Rep 191
Posts |
Quote:
|
|
|
Appreciate
0
|
| 01-03-2019, 12:33 AM | #9 | |
|
New Member
6
Rep 11
Posts |
Quote:
|
|
|
Appreciate
0
|
| 02-08-2019, 06:35 PM | #10 |
|
New Member
6
Rep 21
Posts |
So the distressed lights showed up, but because I fixed the mounting brackets with concrete epoxy, I decided I didn't want to drop my bumper to replace anything. The short answer, unless my light breaks again. I likely won't be taking it apart to find out.
|
|
Appreciate
0
|
Post Reply |
| Bookmarks |
|
|


