I developed this system to get round the problem of only one jacking point at each wheel. As you know, having jacked the vehicle up, you need some other strong point to position a secure support such as an axle stand.
My system consists of a timber stand and a timber bridge piece in conjunction with a small trolley jack, and it uses the official jacking point to do everything.

Ive used the system previously on Audi A3 S-line, A4 S-line, Skoda Yeti, and Peugeot 107, and first wrote it up on VWAudiForum.co.uk.
For my X3 (2011 2.0d SE), some minor dimensional changes were required, and I understand the same design of jacking point is used on many BMW models. But in any case the technique is easily adaptable to almost any make or model of car.
Not all photos show the X3 version, but the dimensioned sketches are for the X3.
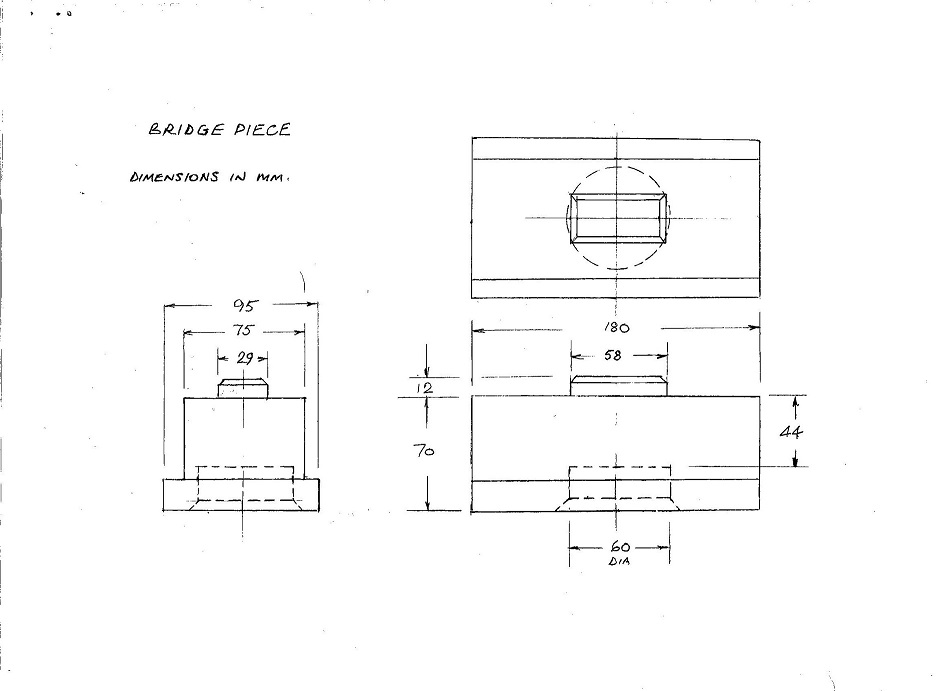
 The bridge piece
 The X3 jacking point allows a particularly simple design for the bridge piece.
The base is socketed to locate on the jack. The prominence on top locates snugly in the X3 jacking point. Both these features are chamfered for easy entry.
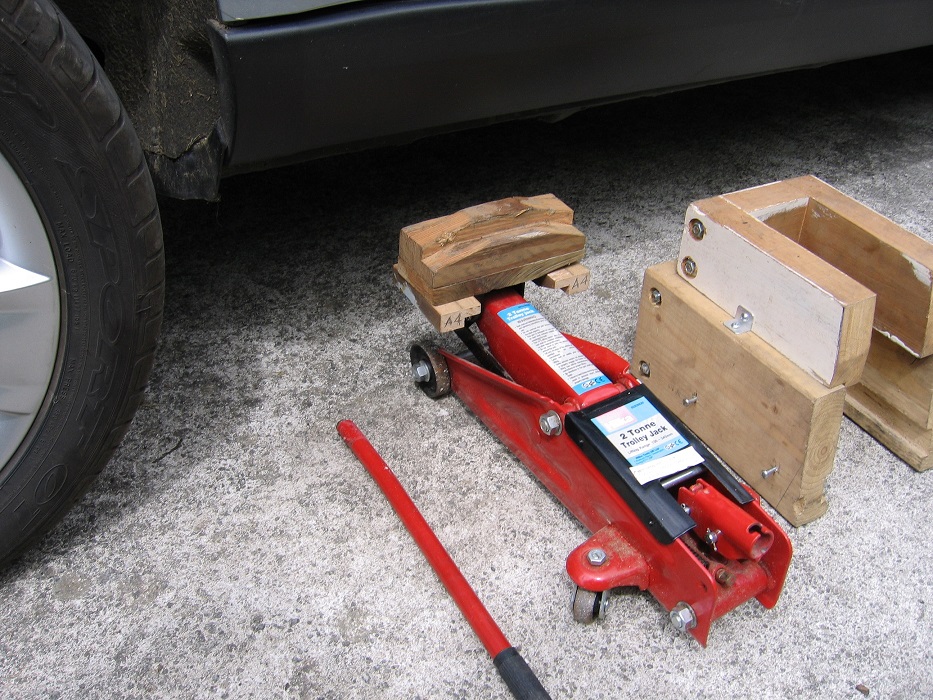
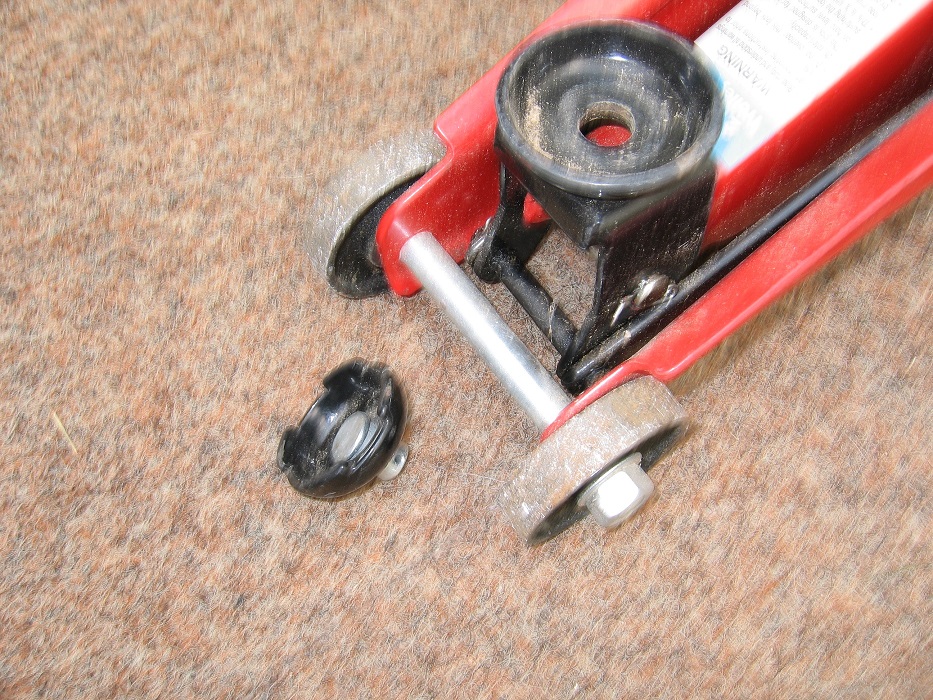
The trolley jack A small cheap trolley jack is best, to allow the stand, which must fit around it, to be reasonably compact. No need for a high lift jack because the bridge piece gives extra height.
I use a Hilka 2-tonne jack. It comes with a loosely-mounted cup which has some freedom to tilt. But we need a stable base for the bridge piece, so we must remove the cup. On my jack, this leaves a stable seat of 60 mm diameter.
 Thickness of bridge piece
 There are two requirements for the thickness of the bridge piece, which inevitably are conflicting. It must support the weight of the vehicle on the jack and it must support the weight of the vehicle on the stand.
Bridge piece on jack Its important to limit the height of the bridge piece on the jack, to prevent instability:- When raising or lowering the vehicle, the jack arm moves through an arc, and the jack must be free to roll in and out. If the ground is rough (or soft) and the jack does not move freely, it will impose a horizontal load which could cause the bridge piece to topple. (If you cannot avoid rough ground, you could lay down a sheet of plywood as a base board).
Bridge piece on stand When the bridge piece is sitting on the stand, its a beam, so needs strength in bending, therefore plenty of thickness. But as we have just seen, thickness is limited by the need for stability on the jack. The dimensions shown are a compromise between these requirements.
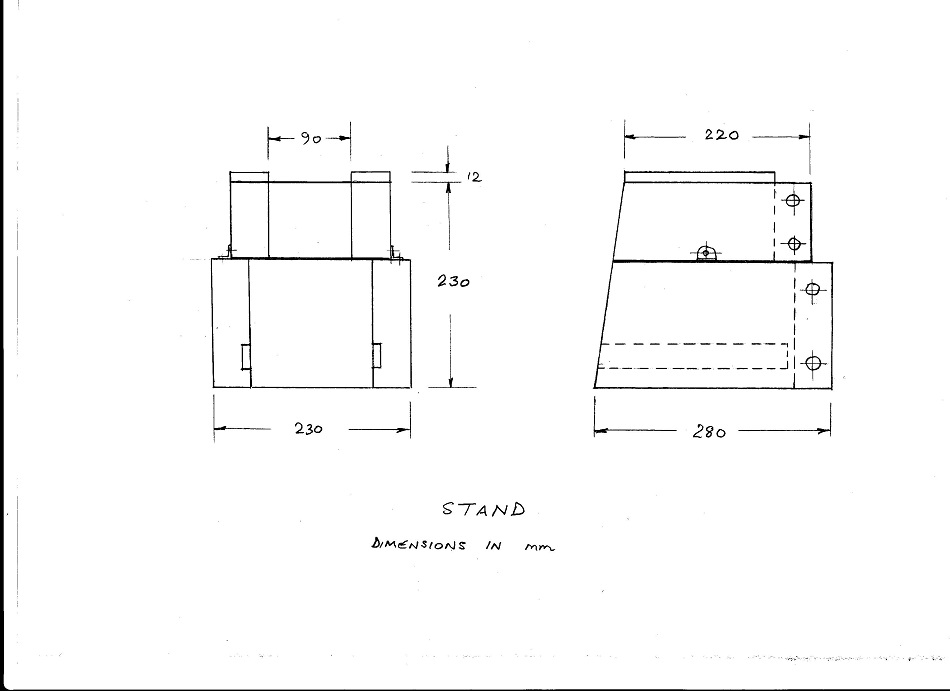
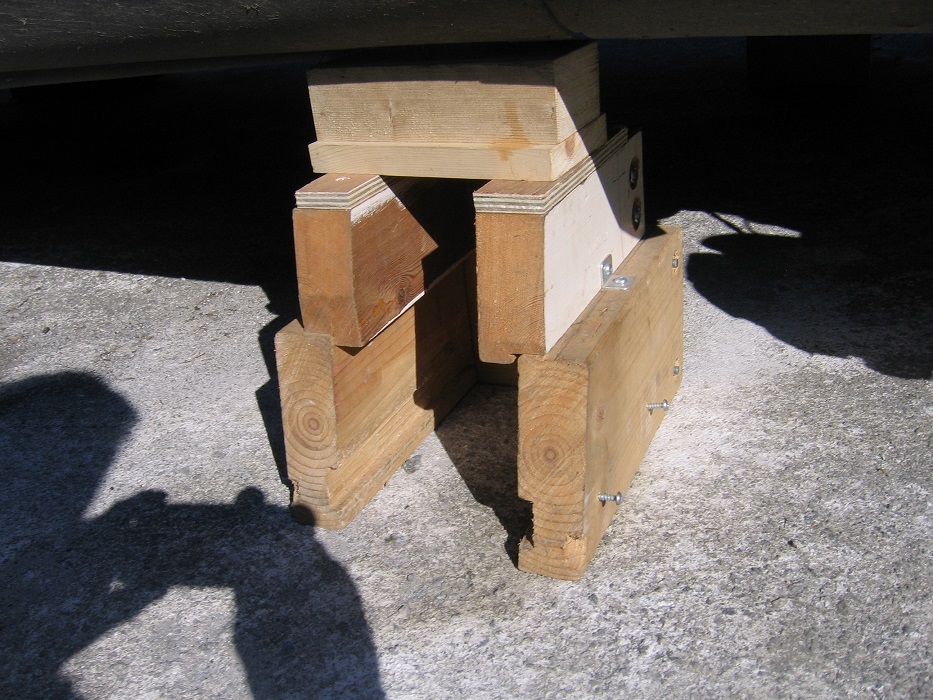
The stand There must be any number of ways of making the stand. I used 45 x 145 mm softwood as the basis for making the U shapes. Those with welding facilities might prefer a steel fabrication.
By controlling the width of the stand, I was able to limit the distance spanned by the bridge piece to 90 mm.
The lower U shape fits the trolley jack closely, with slots for the axle nuts as shown. (But not too snug a fit around the trolley wheels or the stand may jam).
The upper U shape is narrower to reduce the span of the bridge piece.
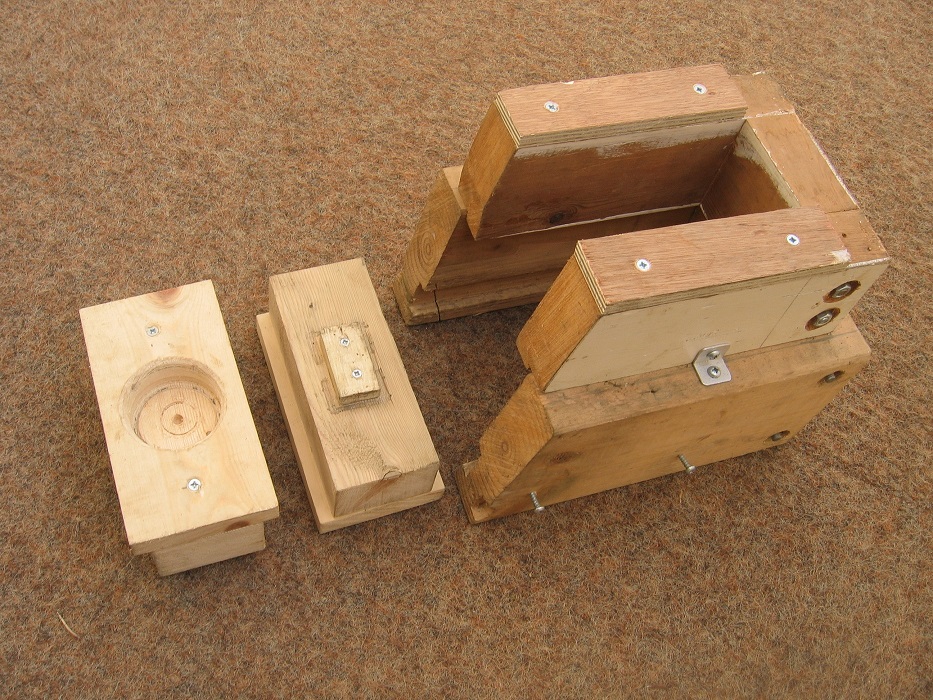
I used M8 threaded rod with nuts and washers to assemble the U shapes. Counter-boring to recess the nuts is not essential, it just looks neater.
Originally I rebated the upper U to locate securely on the lower U, but I reckon thats unnecessary, and its OK to simply join the upper and lower Us with angle brackets and screws. Keeping the legs of the U vertical removes any tendency for them to spread under load.
The extra height of the X3 (and Yeti) jacking points required extra height on the stand in the form of the 12mm packing pieces shown.
Procedure
Jack up the vehicle and manoeuvre the stand behind the jack

Slide the stand forward until fully engaged with the jack (back of stand must be in contact with jack wheels)
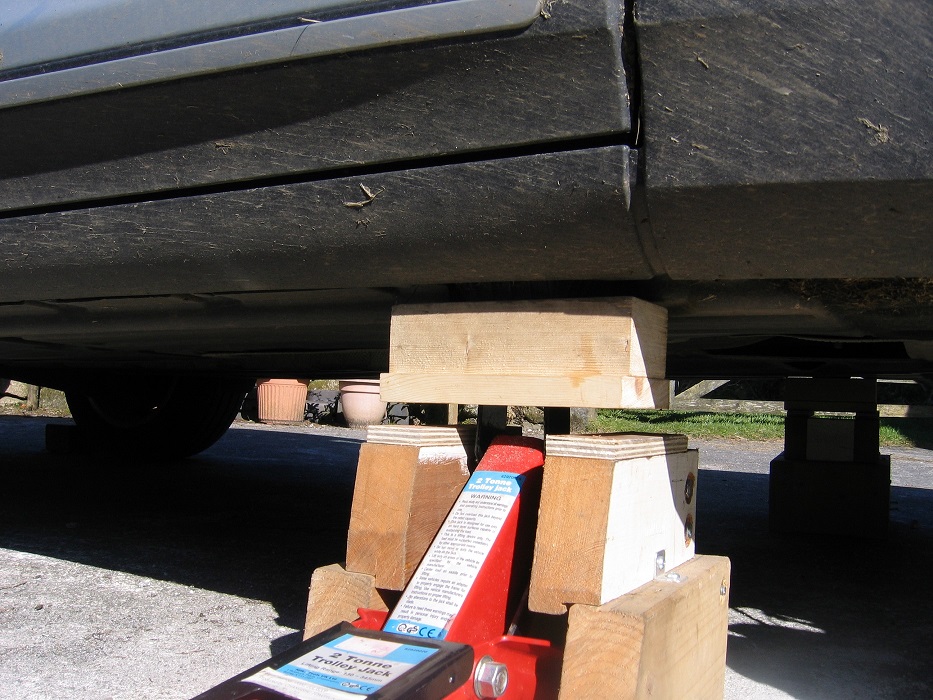
Lower vehicle onto stand
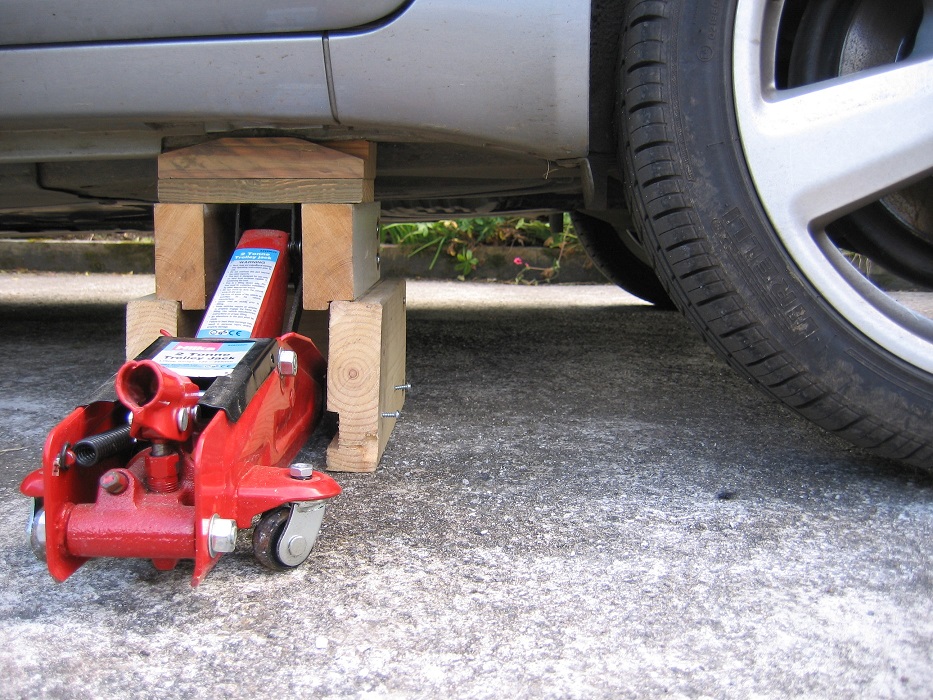
Remove jack.
 Safety
 Compared with the usual axle stand, I reckon the timber stand is stronger, and the base is as broad or broader so it should be at least as stable. Because timber expands and contracts with the weather, its advisable to check the tightness of the stand nuts before every use, but this should settle down after a season or two.
If protected from damp and woodworm, Id expect the hardware to last a lifetime.
I much prefer to work on a vehicle supported by my method, rather than the usual axle stand arrangement. But more than that, I find it removes the hassle from the jacking up process, and as such is an encouragement to keep on DIYing.
Alternatives Im sure I cant be alone in developing the idea, so I hope the thread may encourage others to come forward with their designs.
Ive not found anything of the sort commercially available in the UK, or perhaps Ive not looked hard enough. There is a rather nice-looking shaped alloy stand available from the US,
http://www.jackpointjackstands.com/. At $300 plus shipping per pair, theyre quite expensive. An adaptor for BMWs is available at extra cost.