Okay we're back again for another DIY!
The patient is a 2012 BMW X3 35i with 81K miles. I have chosen to go with Redline 75w-85, which is equivalent to OEM Part # 83222413511.
Link to fluid here ------->
https://www.ecstuning.com/b-redline-...art/50104~red/
NOTE: This same fluid can also be used for the rear differential!


Before you start this DIY make sure you have a nice fluid transfer pump. The one I used can be viewed here:
https://www.ecstuning.com/b-schwaben.../022253sch01a/
Here is a parts list of everything you'll need for this DIY:
- 1 quart of front differential fluid
- fluid transfer pump
- ratchet
- extensions
- 8mm socket
- 10mm socket
- 14mm hex socket
The two following pictures are the jacking points as described by BMW. The first picture shows the jacking points, and the second picture is the jack pads underneath the vehicle. Use these as a guide to properly raise and support your X3.
NOTE: Be sure to make sure the car is level once it's raised into the air. This will allow for the proper level of fluid to be put back into the vehicle.


Once the vehicle is up in the air, grab your 8mm and 10mm sockets and go to town on the lower engine cover underneath the vehicle.

From under the vehicle looking up, here is the front differential. You can easily see the drain bolt on the bottom.


It is a small window looking inboard from the LF wheel to locate the fill bolt.
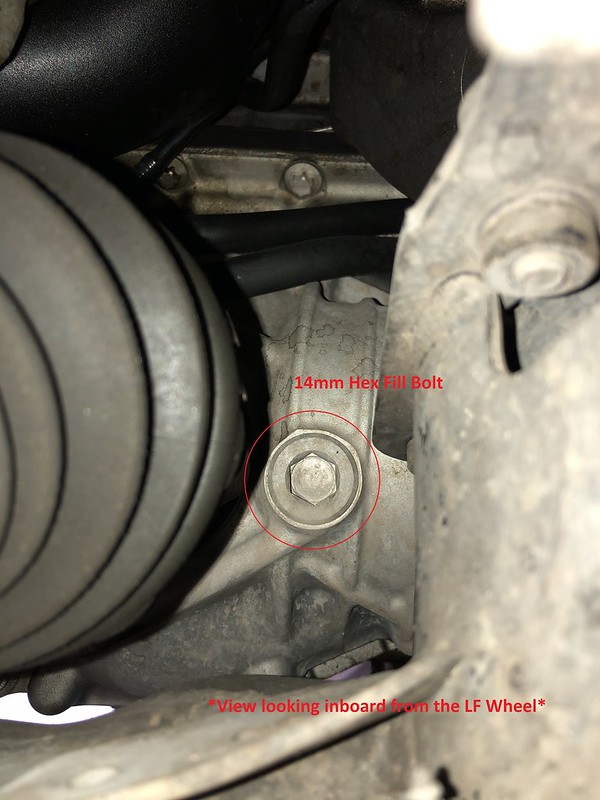
Okay let's get to work! Grab your 14mm hex socket, a 6 inch extension (roughly) and your ratchet. Break loose the fill bolt FIRST before you do anything else. We would hate to remove the drain bolt first, and then have an issue removing the fill bolt. Know what I mean? Again, this view is looking inboard from the LF wheel. Make sure you have a drain pan ready to catch any fluid that may come out once the fill bolt is removed.

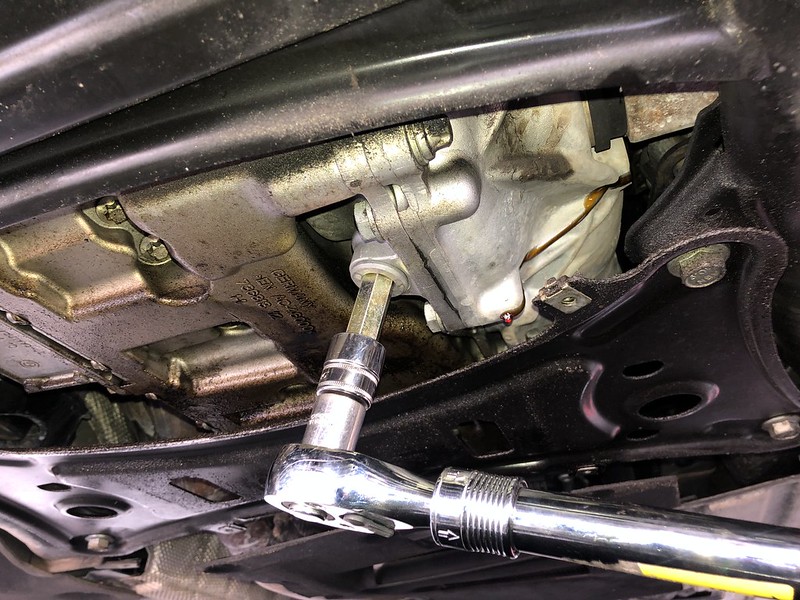
This view is from the ground looking up at the fill bolt with my socket already in place.

Once the fill bolt is removed, let's go ahead and remove the drain bolt on the bottom of the front differential. Again, make sure to have a drain pan ready to catch the old diff oil.
Old fluid on its way out after 81k miles!


From here it should be self explanatory. Once the old fluid is done draining, reinstall the drain bolt. You can also choose to buy new bolts if you wish. I just reused what was already there. Torque to 60Nm. After the drain bolt is torqued properly, go ahead and pump the new fluid in until it starts to come out of the fill hole. Since the wheels will be off of the ground, go ahead and spin the wheels a bit to get the new fluid into all the crevices of the front diff. That could give you a bit more room for new fluid. Then reinstall the fill bolt and torque to 60Nm. Clean up, and reinstall the lower engine cover and celebrate! Front diff fluid change complete!
